HOMEMADE TURTLE CANDY WITH PECANS AND CARAMEL
Homemade Turtle Candy With Pecans and Caramel
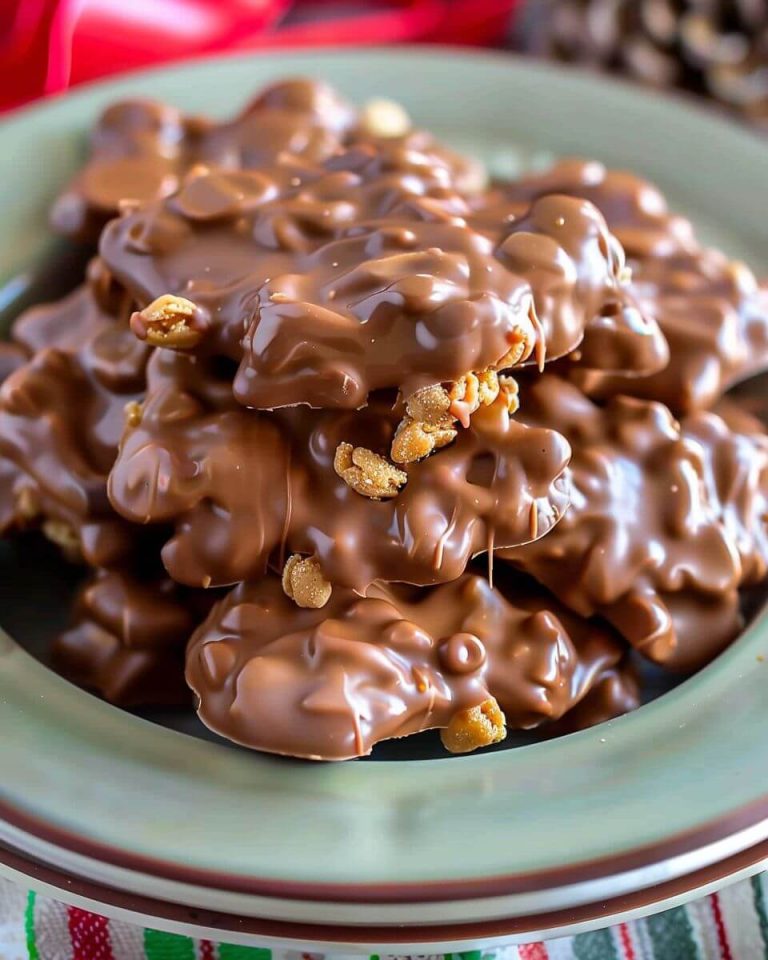
If you love the classic combination of chocolate, caramel, and pecans, this homemade turtle candy with pecans and caramel is a must-make treat. Each piece has buttery toasted pecans, soft chewy caramel, and a smooth layer of rich chocolate on top.
These candies look fancy, but they’re surprisingly simple to make at home. You only need three main ingredients, and there’s no complicated candy-making equipment involved.
They’re perfect for Christmas candy trays, homemade gifts, holiday parties, or those moments when you want something sweet with just the right mix of crunch and chewiness.
Why You’ll Love This Homemade Turtle Candy
This old-fashioned candy recipe is simple, rich, and always a crowd-pleaser.
- Only three main ingredients: Pecans, caramel, and chocolate do all the work.
- Easy to make: No candy thermometer is required.
- Perfect for gifting: These turtles look beautiful in candy boxes or holiday tins.
- Great texture: Crunchy nuts, chewy caramel, and smooth chocolate make every bite satisfying.
- Make-ahead friendly: They store well, so you can prepare them before a party or holiday.
And honestly, homemade turtles just feel a little special. They have that candy-shop look without the candy-shop price tag.
Ingredients You’ll Need
You only need a few simple ingredients for this recipe.
- 12 ounces soft caramels: Store-bought wrapped caramels work perfectly. Homemade caramel can also be used.
- 6 ounces pecan halves, toasted: Toasting brings out their buttery, nutty flavor.
- 8 ounces semisweet chocolate: Chocolate chips, chopped chocolate bars, or melting chocolate all work well.
Optional: If your caramels are very firm, add 1 tablespoon of water while melting them to help create a softer texture.
How to Make Homemade Turtle Candy
Prep Time: 20 minutes
Chilling Time: 30 minutes
Total Time: About 50 minutes
Yield: Approximately 20–24 candies
Step 1: Prepare the Baking Sheet
Line a large baking sheet with parchment paper or aluminum foil.
If you’re using foil, lightly coat it with nonstick cooking spray.
This makes it much easier to remove the finished candies once the caramel and chocolate have set.
Step 2: Toast the Pecans
If your pecans aren’t already toasted, spread them on a baking sheet and toast them in a 350°F oven for about 5–7 minutes.
Watch them closely, since nuts can go from toasted to burned pretty quickly.
Let the pecans cool before assembling the candy.
Step 3: Arrange the Pecan Clusters
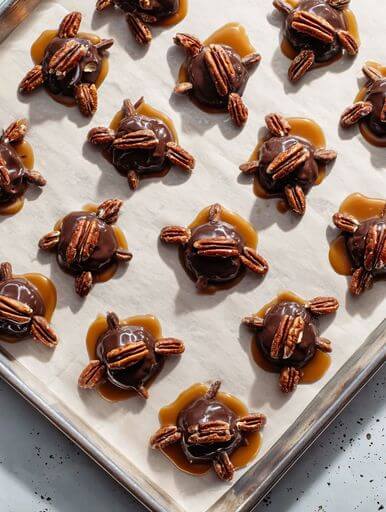
Arrange 4 pecan halves together for each turtle, pointing them in different directions to resemble little legs.
You can also simply make small piles of pecans if you don’t care about the classic turtle shape.
Leave a little space between each cluster so the candies don’t run together.
Step 4: Melt the Caramels
Unwrap the caramels and place them in a microwave-safe bowl.
If they’re especially firm, add a spoonful of water.
Microwave in 30-second intervals, stirring well after each one, until the caramel is completely melted and smooth.
Let it cool for a minute or two before spooning it over the nuts.
Step 5: Add the Caramel
Spoon a small amount of melted caramel into the center of each pecan cluster.
You want enough to hold the nuts together without completely covering them.
Don’t worry about making each candy perfectly round. A slightly rustic look is part of the charm.
Step 6: Melt the Chocolate
Place the chocolate in a microwave-safe bowl.
Microwave in short intervals, stirring frequently, until smooth.
You can also melt the chocolate over a double boiler if you prefer.
Step 7: Add the Chocolate Layer
Spoon melted chocolate over the caramel on each candy.
Use the back of the spoon to spread it slightly, allowing some chocolate to drip down the sides.
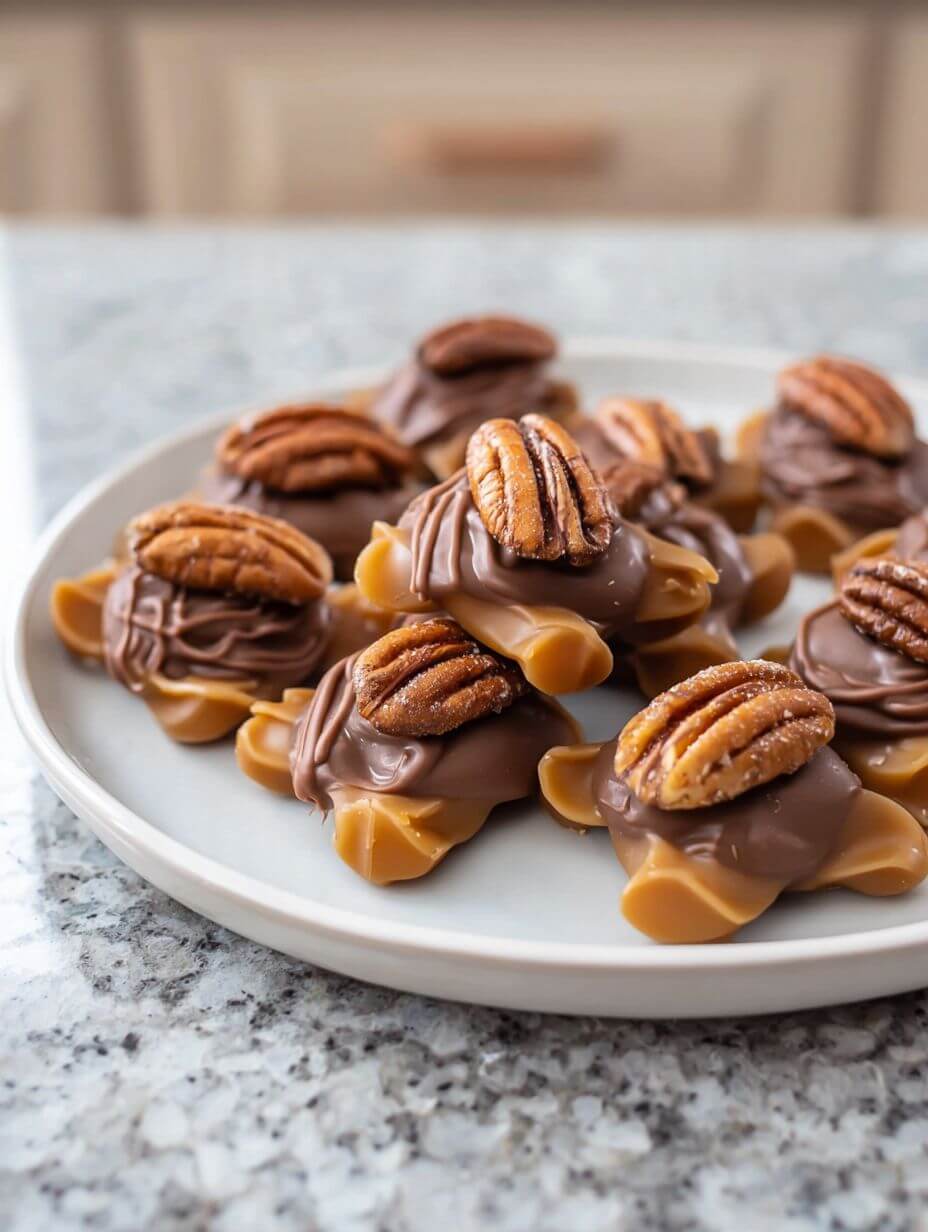
The chocolate should cover most of the caramel while still letting some pecans peek out around the edges.
Step 8: Chill Until Set
Place the baking sheet in the refrigerator for at least 30 minutes, or until the caramel and chocolate are firm.
Once set, gently lift each candy from the parchment or foil.
Let them sit at room temperature for a few minutes before serving for the best texture.
Tips for the Best Turtle Candy
A few small details can make homemade turtle candy turn out even better.
Toast the pecans. This extra step makes a noticeable difference in flavor.
Don’t overheat the caramel. Caramel can become too stiff if overheated, so melt it gently and stir often.
Use good chocolate. Since chocolate is one of only three main ingredients, choose a brand you enjoy eating on its own.
Let the caramel cool slightly. Piping-hot caramel can spread too much and make messy clusters.
Work in small batches if needed. If the caramel or chocolate starts to thicken while you’re assembling, simply warm it for a few seconds.
Serve at room temperature. The caramel becomes softer and chewier once the candies lose their refrigerator chill.
Easy Variations to Try
This classic turtle candy recipe is delicious as written, but there are plenty of ways to change it up.
- Milk chocolate turtles: Use milk chocolate instead of semisweet for a sweeter candy.
- Dark chocolate turtles: Choose dark chocolate for a richer, slightly less sweet version.
- Sea salt turtles: Sprinkle a tiny pinch of flaky sea salt over the chocolate before it sets.
- Almond turtles: Replace the pecans with roasted almonds.
- Cashew turtles: Use whole cashews for a buttery, slightly softer crunch.
- White chocolate turtles: Swap in white chocolate for a fun holiday variation.
You can even make a mixed batch with several types of chocolate for a pretty candy platter.
How to Store Homemade Turtle Candy
One of the best things about this recipe is how well the candies keep.
Room temperature: Store the turtles in an airtight container in a cool room for up to 2 weeks.
Refrigerator: Keep them in an airtight container for up to 2 weeks. Let them come to room temperature before serving for the best texture.
Layering tip: Place parchment or wax paper between layers so the candies don’t stick together.
Avoid storing them somewhere warm, since the chocolate and caramel may soften too much.
Can You Freeze Turtle Candy?
Yes, you can freeze homemade turtle candy.
Arrange the candies in a freezer-safe container with parchment paper between the layers. Freeze for up to 2 months for the best quality.
When you’re ready to eat them, thaw them in the refrigerator first, then let them come to room temperature.
This helps prevent condensation from forming on the chocolate.
What to Serve With Turtle Candy
These candies are rich, so they pair beautifully with simple drinks and desserts.
Serve them with hot coffee, tea, or a cold glass of milk.
For a holiday candy tray, combine them with chocolate bark, fudge, peanut butter balls, or sugar cookies.
They also make a lovely homemade gift. Pack them in small candy boxes lined with parchment paper and tie the box with a festive ribbon.
And if you’re making them for Christmas, a few sea-salted turtles tucked into a cookie tin can disappear surprisingly fast.
Frequently Asked Questions
Why are they called turtle candies?
The traditional arrangement of pecans sticking out from beneath the caramel and chocolate resembles a little turtle with legs.
Can I use caramel sauce instead of soft caramels?
Not usually. Regular caramel sauce is often too thin and may not set properly. Soft wrapped caramels or a thick homemade caramel work better.
Do I have to toast the pecans?
No, but it’s highly recommended. Toasting gives the pecans a deeper, richer flavor.
Can I make turtle candy without a microwave?
Absolutely. Melt the caramels in a saucepan over low heat, stirring constantly.
You can melt the chocolate in a double boiler or in a heatproof bowl set over gently simmering water.
Why is my caramel too hard?
It may have been overheated or cooked too long. Adding a small amount of water while melting firm caramels can help keep the finished texture softer.
Can I make these ahead for Christmas?
Yes. These candies are perfect for making several days in advance. Store them in an airtight container in a cool place or in the refrigerator.
Final Thoughts
This homemade turtle candy with pecans and caramel is one of those simple recipes that feels much fancier than the effort required.
With crunchy toasted pecans, chewy caramel, and smooth chocolate, each bite has that classic candy-shop flavor everyone loves.
Make a batch for the holidays, wrap some up for friends, or keep a few hidden away for yourself. No judgment there.
Once you see how easy these are to make, you may never look at store-bought turtle candy quite the same way again.
Homemade Turtle Candy With Pecans and Caramel
Ingredients
Method
- Line a large baking sheet with parchment paper or aluminum foil. If using foil, lightly coat it with nonstick cooking spray.
- If the pecans are not already toasted, spread them on a baking sheet and toast at 350°F (175°C) for 5–7 minutes. Let them cool completely.
- Arrange about 4 pecan halves for each candy, pointing them in different directions to create the traditional turtle shape. Alternatively, arrange them in small clusters.
- Place the unwrapped caramels in a microwave-safe bowl. Add 1 tablespoon of water if the caramels are especially firm.
- Microwave the caramels in 30-second intervals, stirring well after each interval, until completely melted and smooth. Allow the caramel to cool for 1–2 minutes.
- Spoon a small amount of melted caramel into the center of each pecan cluster, using enough to hold the nuts together while leaving some pecans visible around the edges.
- Place the semisweet chocolate in a microwave-safe bowl. Microwave in short intervals, stirring frequently, until smooth. Alternatively, melt the chocolate using a double boiler.
- Spoon the melted chocolate over the caramel layer on each candy. Spread it slightly with the back of the spoon, allowing some caramel and pecans to remain visible.
- Refrigerate the candies for at least 30 minutes, or until the chocolate and caramel are firm.
- Gently lift the candies from the parchment or foil. Let them sit at room temperature for a few minutes before serving for the best texture.