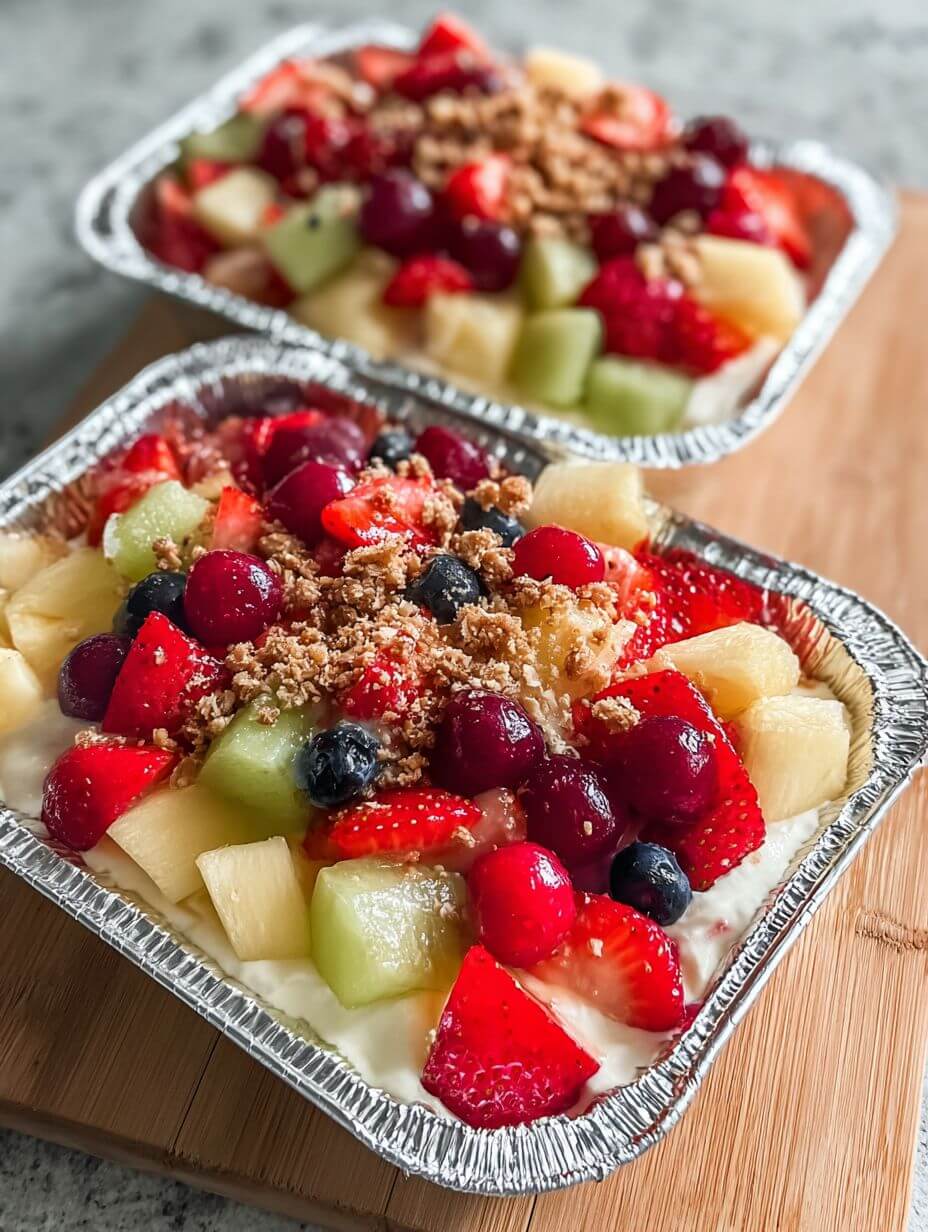
Cheesecake Fruit Salad in a Tin Foil Tray
Cheesecake Fruit Salad in a Tin Foil Tray (Creamy, Sweet, and Made to Share)
There are desserts you plate carefully… and then there are desserts you bring in a big tray, set down on the table, and watch everyone quietly line up for.
This is that second kind.
Cheesecake Fruit Salad is one of those recipes that feels familiar, a little nostalgic, and always welcome. It’s creamy, lightly sweet, packed with fresh fruit, and just indulgent enough to feel like dessert—without being heavy or complicated.
And serving it in a simple tin foil tray? That’s part of the charm. No fuss, no worrying about presentation perfection, no dishes to bring home. Just scoop, serve, and enjoy.
Why This Recipe Works (Especially for Gatherings)
Let’s be honest—when you’re feeding a group, you want something that checks a few boxes:
- Easy to make
- Easy to transport
- Easy to serve
- And most importantly… something people actually eat
This hits all of them.
The creamy cheesecake base makes it feel like a dessert, while the fruit keeps it fresh and light. It’s the kind of dish that works at potlucks, holidays, school events, or just a casual family get-together.
And because it’s served chilled, you can make it ahead—which is always a win.
Ingredients (Flexible and Crowd-Friendly)
A classic version includes:
- 1 package cream cheese, softened
- 1 cup whipped topping
- ½ cup powdered sugar
- 1 teaspoon vanilla extract
- 1–2 tablespoons lemon juice
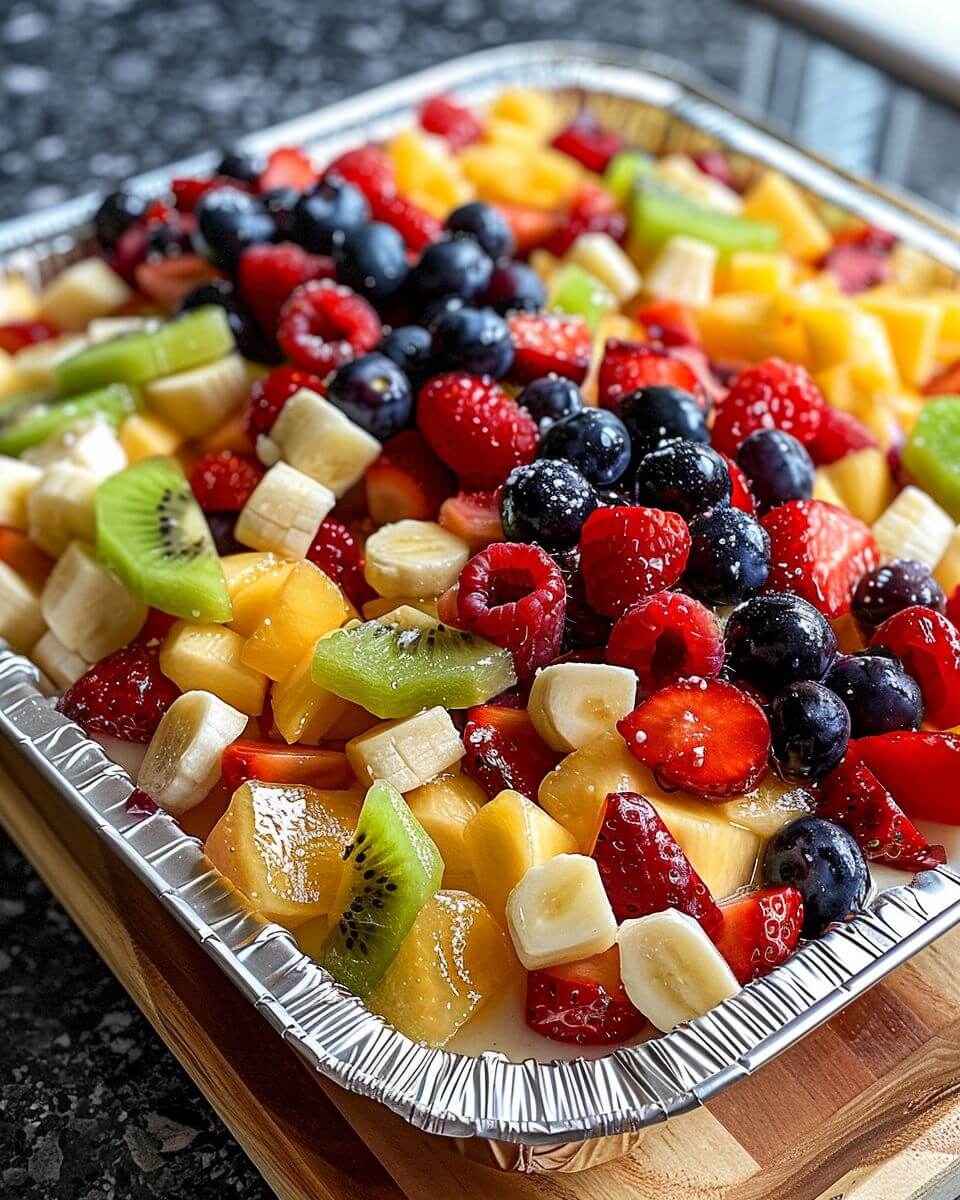
- 4–5 cups mixed fresh fruit
Popular fruit options:
- Strawberries
- Blueberries
- Grapes
- Pineapple
- Kiwi
- Mandarin oranges
Optional add-ins:
- Mini marshmallows
- Crushed graham crackers
- Toasted coconut
A few helpful notes before you start:
Use softened cream cheese
This helps you get that smooth, lump-free texture.
Dry your fruit well
Extra moisture can thin out the mixture.
Balance your fruit
Mix sweet and slightly tart fruits for better flavor.
Step-by-Step (Simple Enough for Any Day)
Start by making the cheesecake base.
In a large bowl, beat the cream cheese until smooth.
Add powdered sugar, vanilla, and lemon juice.
Mix until creamy and fully combined.
Fold in the Whipped Topping
Gently fold in the whipped topping.
This step lightens the mixture and gives it that fluffy, “cheesecake mousse” texture.
Take your time here—you want it smooth and airy, not overmixed.
Add the Fruit (This Is Where It Comes to Life)
Gently fold in your prepared fruit.
Try not to overmix—you want the fruit to stay intact and not release too much juice.
Once everything is combined, transfer the mixture into your foil tray.
Spread it evenly.
Chill Before Serving (Important Step)
Refrigerate for at least 1–2 hours.
This helps the flavors come together and allows the mixture to firm up slightly.
If you’ve got more time, chilling longer only helps.
Texture Tips (So It Stays Creamy, Not Runny)
A few small things make a big difference:
Dry fruit thoroughly before adding.
Avoid overly juicy fruits unless balanced with firmer ones.
Don’t skip chilling—it helps everything set properly.
You’re aiming for a creamy, scoopable consistency—not watery.
Make-Ahead (This Is Where It Shines)
This dessert is perfect for prepping ahead.
You can:
- Make it the night before
- Store it covered in the fridge
- Add delicate toppings (like graham crackers) just before serving
It holds up well and actually tastes better once chilled.
Serving Ideas (Casual or Dressed Up)
Serve straight from the tray with a large spoon—simple and easy.
Or, if you want to elevate it slightly:
- Add a sprinkle of crushed graham crackers on top
- Garnish with extra fruit
- Serve in small cups for individual portions
It works both ways.
A Small Real-Life Note
Some fruit pieces will sink.
Some juice might collect at the bottom.
One corner might get scooped first (it always does).
That’s normal.
It’s not meant to be perfect—it’s meant to be enjoyed.
Why This Recipe Keeps Coming Back
It’s one of those desserts that adapts to whatever you have.
Different fruits, different textures, slightly different flavors each time—but always familiar, always good.
And when you need something quick that still feels like you made an effort, this is an easy choice.
Conclusion
This Cheesecake Fruit Salad combines simplicity, flexibility, and crowd-pleasing flavor in a way that makes it ideal for gatherings of any size. With minimal prep and easy make-ahead options, it offers a dependable dessert that fits seamlessly into busy schedules.
Whether served casually from a tray or dressed up for a special occasion, it delivers a balance of creamy and fresh elements that keeps it approachable and satisfying.
And once it becomes part of your rotation, it’s likely to stay there—because it’s just that easy to rely on.
Cheesecake Fruit Salad in a Tin Foil Tray
Ingredients
Method
- Beat cream cheese until smooth and creamy.
- Add powdered sugar and vanilla; mix until combined.
- Fold in whipped topping until light and fluffy.
- Spread mixture evenly into a foil tray.
- Top with fresh fruit.
- Drizzle caramel sauce over fruit.
- Sprinkle granola on top.
- Refrigerate at least 1 hour before serving.
Notes