Christmas Cherry Bars
Christmas Cherry Bars Recipe (Easy, Buttery, and Perfect for the Holidays)
Nothing says Christmas quite like a tray of homemade treats fresh from the oven. These Christmas cherry bars are sweet, buttery, and filled with delicious cherry pie filling, making them a wonderful addition to your holiday dessert table.
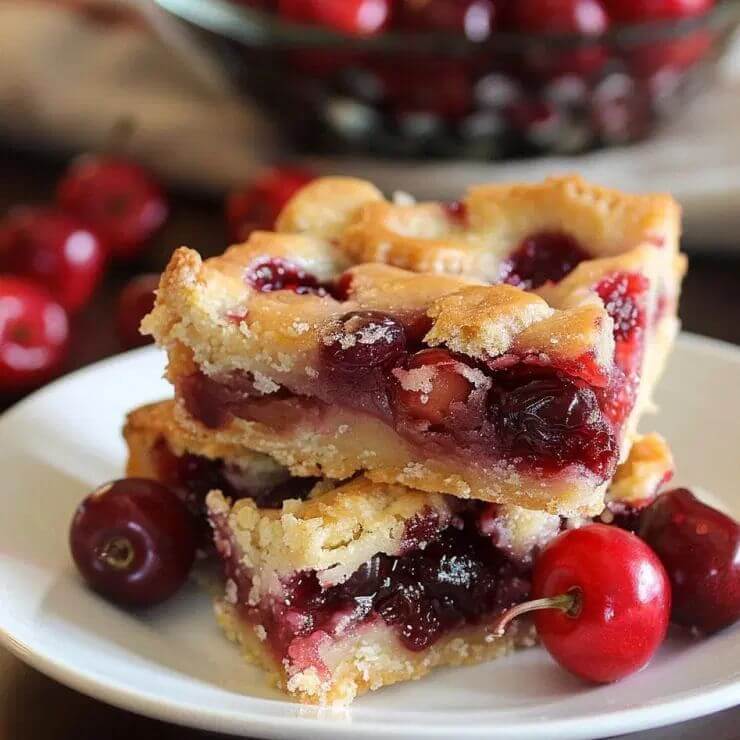
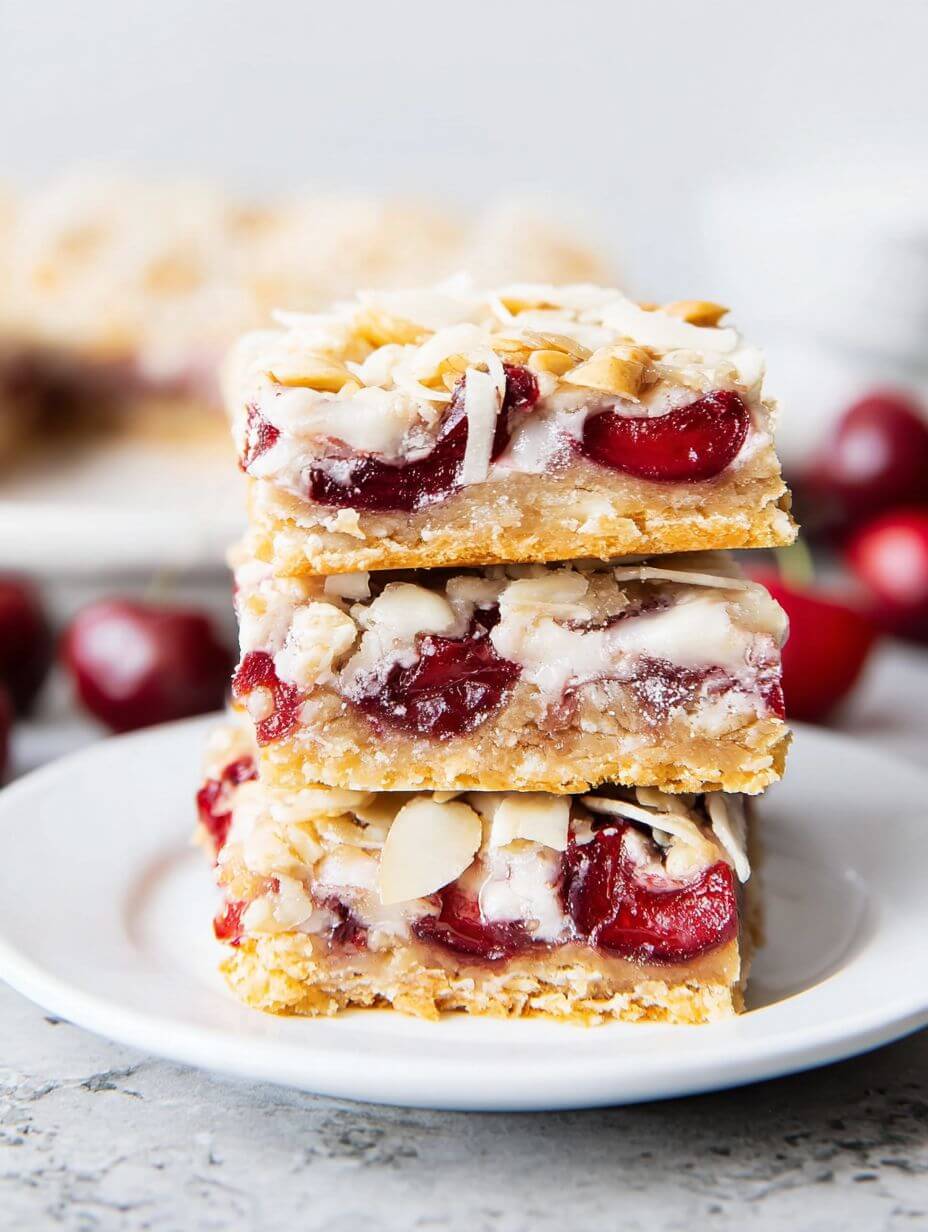
With their soft, cake-like crust, bright red cherry center, and sweet vanilla glaze, these bars look just as festive as they taste. They’re also incredibly easy to make with simple ingredients you probably already have in your pantry.
Whether you’re preparing treats for a Christmas cookie exchange, hosting a holiday party, or baking something special for your family, these cherry bars are sure to bring a little extra joy to the season.
Why You’ll Love These Christmas Cherry Bars
There’s a reason these old-fashioned cherry bars are such a popular holiday dessert. They’re simple, delicious, and perfect for sharing.
- Easy to make: Basic pantry ingredients and straightforward instructions make this recipe beginner-friendly.
- Festive appearance: The bright red cherries and white vanilla glaze create beautiful Christmas colors.
- Soft and buttery: The tender crust pairs perfectly with the sweet, fruity filling.
- Great for sharing: One pan makes enough bars for family gatherings, potlucks, and cookie exchanges.
- Make-ahead friendly: You can bake them the day before your holiday celebration.
And unlike individual Christmas cookies, there’s no need to roll, shape, or decorate each piece. Just bake, glaze, and slice!
Ingredients You’ll Need
These Christmas cherry pie bars come together with a handful of simple baking ingredients.
For the Cherry Bars
- 1 cup unsalted butter, softened: Creates a rich, buttery base and keeps the bars tender.
- 2 cups granulated sugar: Adds sweetness and helps create a soft texture.
- 4 large eggs: Give the batter structure and moisture.
- 1 teaspoon vanilla extract: Adds a warm, sweet flavor that complements the cherries.
- 3 cups all-purpose flour: Provides structure and creates the soft, cake-like crust.
- 1 teaspoon salt: Balances the sweetness and enhances the other flavors.
- 1 can (21 ounces) cherry pie filling: Creates the delicious fruity center and gives the bars their festive red color.
For the Vanilla Glaze (Optional)
- 1 cup powdered sugar: Forms the base of the sweet glaze.
- 2 tablespoons milk: Helps create a smooth, drizzle-friendly consistency.
- ½ teaspoon vanilla extract: Adds a lovely vanilla flavor.
Tip: For a little extra holiday flavor, add ½ teaspoon of almond extract to the batter. Almond and cherry taste wonderful together!
How to Make Christmas Cherry Bars
Prep Time: 15 minutes
Cook Time: 35–40 minutes
Cooling Time: About 1 hour
Total Time: Approximately 2 hours
Servings: 20–24 bars
Step 1: Preheat the Oven
Preheat your oven to 350°F (175°C). Lightly grease a 9 × 13-inch baking pan or line it with parchment paper.
If you’re using parchment paper, leave a little hanging over the edges. This makes it easier to lift the bars out after baking.
Step 2: Cream the Butter and Sugar
In a large mixing bowl, beat the softened butter and granulated sugar together until light and fluffy.
You can use a hand mixer or stand mixer for this step. Creaming the ingredients properly helps create a tender, soft crust.
Step 3: Add the Eggs and Vanilla
Beat in the eggs one at a time, mixing well after each addition.
Add the vanilla extract and continue mixing until everything is combined.
Step 4: Add the Dry Ingredients
In a separate bowl, whisk together the flour and salt.
Gradually add the dry ingredients to the butter mixture, mixing on low speed until just combined.
The batter will be thick and spreadable, similar to a soft cookie dough.
Step 5: Prepare the Base
Measure out approximately 3 cups of batter and spread it evenly across the bottom of your prepared baking pan.
Use a spatula to smooth the surface, making sure the batter reaches the corners.
Step 6: Add the Cherry Filling
Spoon the cherry pie filling over the batter and spread it into an even layer.
Drop small spoonfuls of the remaining batter over the cherries. Don’t worry about covering the filling completely. Leaving a few gaps allows the beautiful red cherries to peek through.
Step 7: Bake Until Golden
Bake for 35–40 minutes, or until the top is lightly golden and the batter is fully cooked.
A toothpick inserted into a section of cake, rather than the cherry filling, should come out without wet batter.
If the center needs more time, continue baking in short intervals.
Remove the pan from the oven and let the bars cool completely on a wire rack.
Step 8: Prepare the Vanilla Glaze
In a small bowl, whisk together the powdered sugar, milk, and vanilla extract until smooth.
Drizzle the glaze over the cooled cherry bars using a spoon or a small piping bag.
Let the glaze set before slicing the dessert into squares or rectangles.
Serve and enjoy!
Tips for Perfect Christmas Cherry Bars
Want your cherry bars to turn out beautifully every time? These simple tips can make a big difference.
Use softened butter. Room-temperature butter creams more easily with sugar, creating a smoother batter.
Don’t overmix. Once you add the flour, mix just until combined. Overmixing can make the bars tough instead of tender.
Spread the filling evenly. Distributing the cherries across the base ensures every piece gets a delicious fruity bite.
Leave gaps in the topping. This creates a pretty, rustic appearance and lets the cherry filling show through.
Cool completely before glazing. If the bars are still warm, the glaze will melt and soak into the crust instead of creating a lovely white drizzle.
For extra-neat slices, use a sharp knife and wipe it clean between cuts.
Delicious Variations to Try
These holiday cherry bars are delicious as written, but you can easily change the flavors to suit your family’s preferences.
- Cherry almond bars: Add ½ teaspoon almond extract to the batter and sprinkle sliced almonds over the glaze.
- Cherry cheesecake bars: Add small dollops of sweetened cream cheese over the cherry filling before adding the top layer.
- Chocolate cherry bars: Sprinkle ½ cup of mini chocolate chips over the cherry filling.
- Mixed berry bars: Replace the cherry pie filling with blueberry or mixed berry pie filling.
- Lemon cherry bars: Add a little lemon zest to the batter and use lemon juice instead of milk in the glaze.
You can even use strawberry pie filling for a different sweet and fruity holiday treat.
How to Store and Freeze Christmas Cherry Bars
One of the best things about this recipe is that you can prepare it ahead of time, making holiday baking a little less stressful.
Room temperature: Store the bars in an airtight container for up to 2 days in a cool room.
Refrigerator: Keep them in an airtight container for up to 5 days. Let them come to room temperature before serving for the best texture.
Freezer: Freeze the bars without the glaze for up to 3 months. Wrap individual pieces in plastic wrap and place them in a freezer-safe container.
When you’re ready to serve, thaw the bars overnight in the refrigerator and add the vanilla glaze after they’ve reached room temperature.
What to Serve With Christmas Cherry Bars
These festive bars are delicious on their own, but they also pair beautifully with other holiday favorites.
Serve them with a warm cup of coffee, hot chocolate, or a glass of cold milk for a cozy afternoon treat.
For a Christmas dessert platter, arrange them alongside gingerbread cookies, sugar cookies, peppermint brownies, and homemade fudge.
You can also serve a slightly warm cherry bar with a scoop of vanilla ice cream for an extra-special dessert.
They’re perfect for holiday parties, Christmas Eve gatherings, and homemade gift boxes for friends and neighbors.
Frequently Asked Questions
Can I use homemade cherry pie filling?
Absolutely! Homemade cherry pie filling works wonderfully. Just make sure it’s thick enough to spread without soaking into the batter.
Can I make Christmas cherry bars ahead of time?
Yes! You can bake the bars one day in advance and store them in an airtight container. For the prettiest finish, add the vanilla glaze shortly before serving.
Can I use a different pie filling?
Of course! Blueberry, strawberry, raspberry, and apple pie fillings are all delicious alternatives.
Why are my cherry bars too soft in the middle?
They may need a little more baking time, especially if the cherry filling adds extra moisture. Check the cake portion with a toothpick and continue baking until no wet batter remains.
Do I have to add the vanilla glaze?
Not at all! The bars are delicious without it. You can also dust them lightly with powdered sugar for a simpler finish.
Final Thoughts
These Christmas cherry bars are the perfect combination of buttery cake, sweet cherry filling, and smooth vanilla glaze. Their festive colors and delicious homemade flavor make them a wonderful addition to any holiday celebration.
Whether you’re baking for a Christmas party, preparing homemade gifts, or enjoying a cozy afternoon with your family, this easy recipe is sure to become a holiday favorite.
Make a batch, pour yourself a warm drink, and enjoy a little taste of Christmas in every bite!
Christmas Cherry Bars
Ingredients
Method
- Preheat the oven to 350°F (175°C). Lightly grease a 9 × 13-inch baking pan or line it with parchment paper, leaving some overhang for easy removal.
- In a large mixing bowl, beat the softened butter and granulated sugar together using a hand mixer or stand mixer until light and fluffy.
- Add the eggs one at a time, beating well after each addition. Mix in the vanilla extract until fully incorporated.
- In a separate bowl, whisk together the flour and salt. Gradually add the dry ingredients to the butter mixture, mixing on low speed until just combined. The batter should be thick and spreadable.
- Measure approximately 3 cups of batter and spread it evenly across the bottom of the prepared baking pan. Smooth the surface with a spatula, making sure the batter reaches the corners.
- Spoon the cherry pie filling over the batter and spread it into an even layer. Drop small spoonfuls of the remaining batter over the cherry filling, leaving a few gaps so the cherries remain visible.
- Bake for 35–40 minutes, or until the top is lightly golden and the batter is fully cooked. A toothpick inserted into a section of cake should come out without wet batter.
- Remove the pan from the oven and place it on a wire rack. Allow the bars to cool completely for approximately 1 hour.
- To prepare the optional vanilla glaze, whisk together the powdered sugar, milk, and vanilla extract in a small bowl until smooth and drizzle-friendly.
- Drizzle the vanilla glaze evenly over the cooled cherry bars. Allow the glaze to set before slicing into 24 squares or rectangles. Serve and enjoy!