Twix Cookies
Twix Cookies (Buttery, Caramel-Filled, and Worth Every Step)
There are cookies you bake on autopilot… and then there are cookies you plan for.
Twix Cookies fall into that second category.
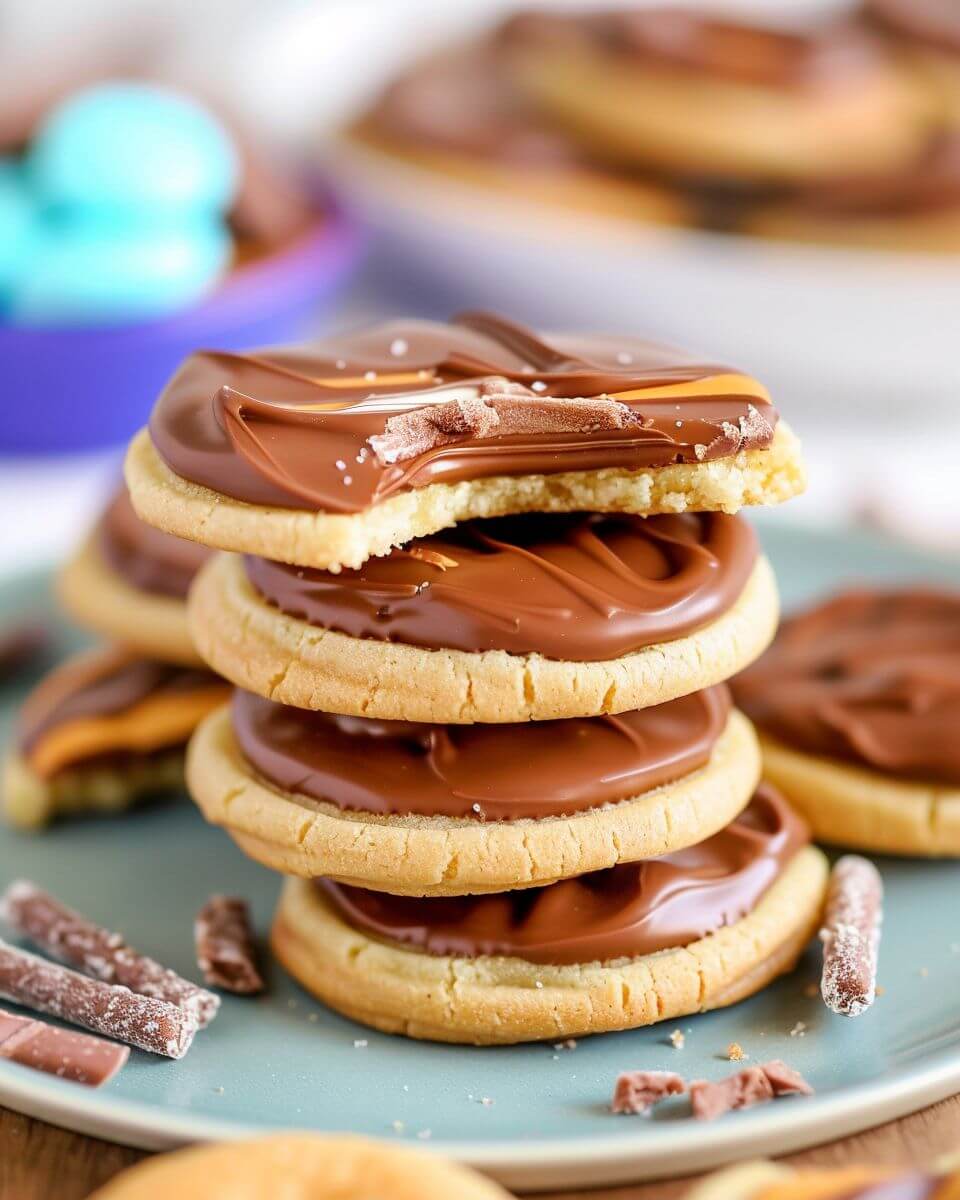
They’re layered—soft, buttery cookie base, gooey caramel center, and a smooth chocolate topping—and yes, they take a little more time than your average drop cookie. But here’s the thing: none of the steps are complicated. It’s just a matter of building the layers, one at a time.
And once you take that first bite? You get it.
It’s the contrast. The soft cookie, the chewy caramel, the slight snap of chocolate on top. It hits every texture at once, and that’s what makes them feel a little special—like something you’d usually buy, but somehow better homemade.
Why These Cookies Work (It’s All About Layers)
Let’s break it down for a second.
Each layer has a job:
- The cookie base is sturdy but tender
- The caramel adds chewiness and sweetness
- The chocolate balances everything with a smooth finish
If any one layer is off, the whole cookie feels different. But when they’re done right? They come together in a way that feels… complete.
And the best part? You don’t need advanced baking skills to get there.
Ingredients (Simple Components, Smart Choices)
For the cookie base:
- 1 cup unsalted butter, softened
- ¾ cup granulated sugar
- 1 teaspoon vanilla extract
- 2 cups all-purpose flour
- ½ teaspoon salt
For the caramel layer:
- 1 (11 oz) bag soft caramels (unwrapped)
- 2 tablespoons heavy cream
For the chocolate topping:
- 1½ cups milk or semi-sweet chocolate chips
- 1 teaspoon coconut oil or butter (optional, for smoothing)
A few helpful notes before you start:
Use soft caramels
They melt more evenly and save time compared to making caramel from scratch.
Don’t overbake the base
You want it lightly golden, not crisp—it will firm up as it cools.
Chocolate choice matters
Milk chocolate gives that classic Twix feel, but semi-sweet balances sweetness better.

Step-by-Step (One Layer at a Time—No Rush)
Start by preheating your oven to 350°F and lining a baking sheet.
In a bowl, cream together the butter and sugar until light and fluffy.
Add vanilla, then mix in flour and salt until a soft dough forms.
Shape and Bake the Base
You can do this two ways:
- Press the dough into a rectangular pan and bake as a slab
- Or form individual cookie rounds
For that classic “Twix bar” feel, the slab method works beautifully.
Bake for about 15–18 minutes, until just lightly golden.
Let it cool completely before adding caramel.
Melt the Caramel (Slow and Steady)
In a saucepan or microwave-safe bowl, combine:
- Caramels
- Heavy cream
Heat gently, stirring frequently, until smooth and fully melted.
This takes a few minutes—don’t rush it or the caramel can seize.
Add the Caramel Layer
Pour the melted caramel over the cooled cookie base.
Spread evenly using a spatula.
Let it sit until set—this can take about 30–60 minutes at room temperature, or faster in the fridge.
Chocolate Topping (The Final Layer)
Melt the chocolate chips with a bit of coconut oil or butter if using.
Stir until smooth.
Pour over the caramel layer and spread evenly.
Let the chocolate set completely before slicing.
Cutting (A Small but Important Step)
Once fully set, cut into bars or squares.
Use a sharp knife—and wipe it clean between cuts for neater edges.
It’s a small detail, but it makes a difference in presentation.
Texture Tips (This Is What Makes Them Special)
You’re aiming for:
- A soft but firm cookie base
- Smooth, chewy caramel
- A clean chocolate layer that sets but doesn’t crack too hard
To get there:
Don’t overbake the base.
Let each layer cool before adding the next.
Use good-quality chocolate for a smoother finish.
Make-Ahead & Storage (Surprisingly Practical)
These cookies actually store well.
Keep them:
- In an airtight container at room temperature for a few days
- In the fridge if your kitchen is warm
They also freeze well—just layer with parchment to prevent sticking.
Serving Ideas (They Fit Everywhere)
These cookies feel a little special, which makes them great for:
- Holiday dessert trays
- Homemade gifts
- Bake sales
- Weekend treats
Or honestly, just something to keep in the kitchen for when you want a really good cookie.
A Small Real-Life Note
Some caramel might spill over the edges.
Some chocolate layers might not be perfectly smooth.
One piece might not cut cleanly.
That’s normal.
And usually, those slightly imperfect pieces are the ones that get eaten first.
Why These Feel Worth the Effort
Yes, they take a few extra steps.
But each step is simple. And the end result feels like something you’d buy at a bakery—only fresher, softer, and made exactly the way you like it.
And once you’ve made them once, they stop feeling complicated.
Conclusion
These Twix Cookies combine familiar flavors with a layered approach that creates a satisfying and well-balanced dessert. While they require a few extra steps compared to standard cookies, the process remains straightforward and approachable.
With their combination of texture and flavor, they offer a reliable option for both special occasions and everyday treats.
And once you’ve tried them, they tend to become one of those recipes you come back to when you want something that feels just a little more indulgent—without being out of reach.
Twix Cookies
Ingredients
Method
- Preheat oven to 350°F and line baking sheets.
- Cream butter and sugar until light and fluffy.
- Mix in vanilla, then add flour and salt to form dough.
- Scoop dough and flatten slightly, place a Twix piece and caramel inside, then cover with more dough.
- Place on baking sheet and bake for 10–12 minutes until lightly golden.
- Melt chocolate chips and dip or drizzle over cooled cookies.
- Let chocolate set before serving.
Notes