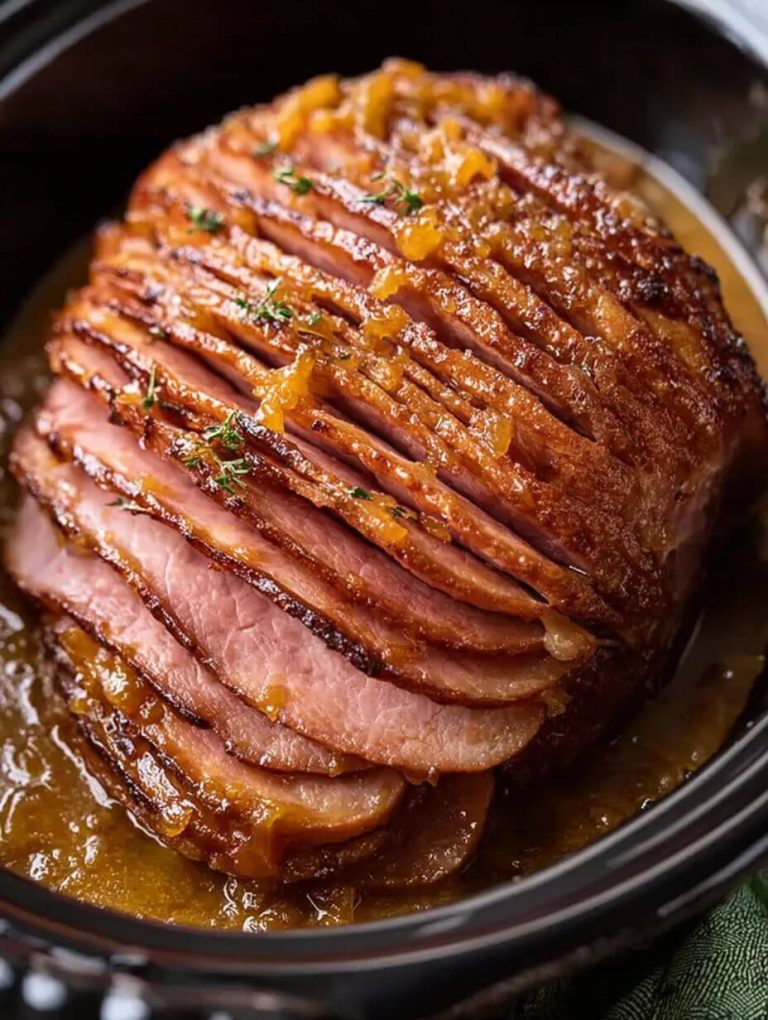
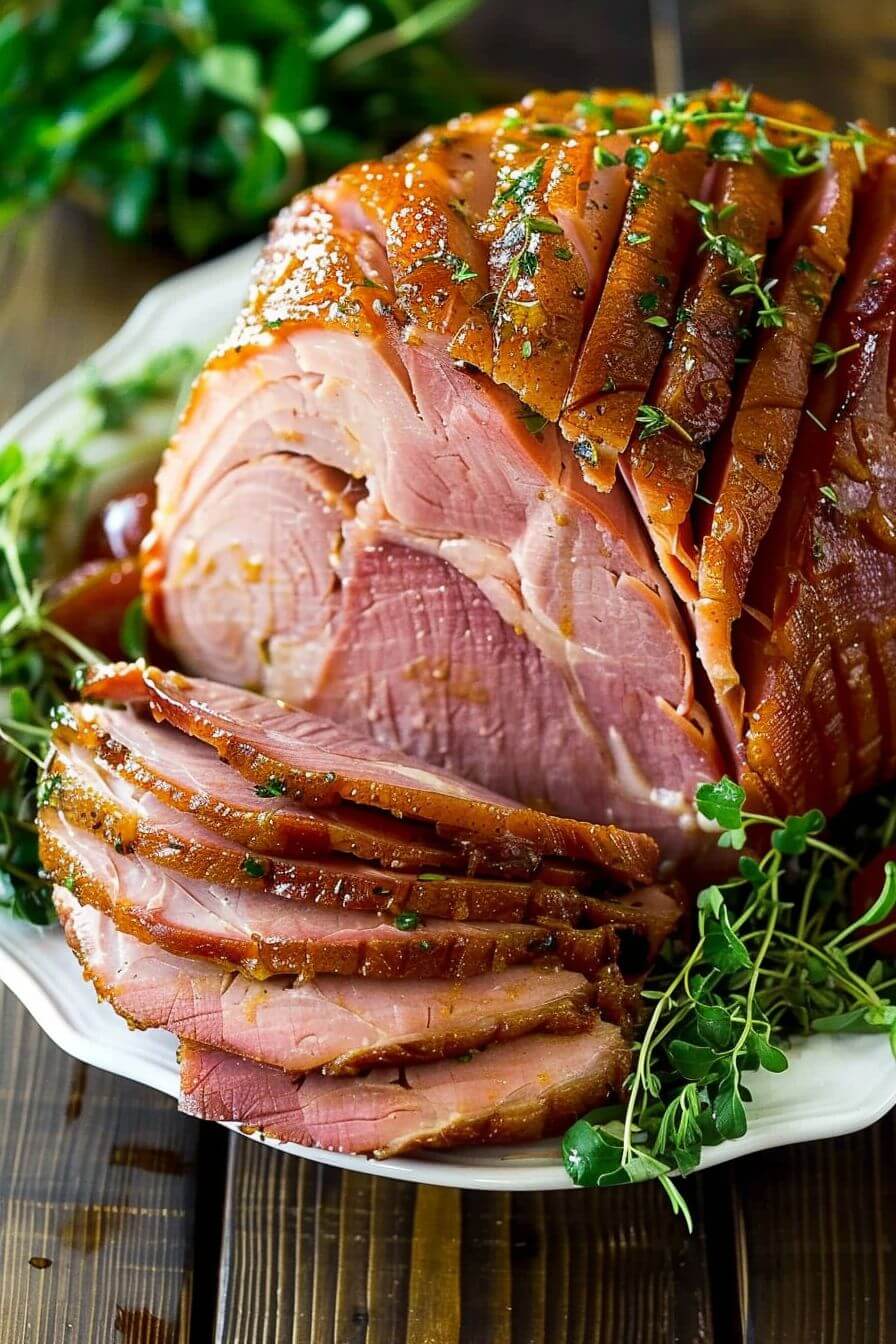
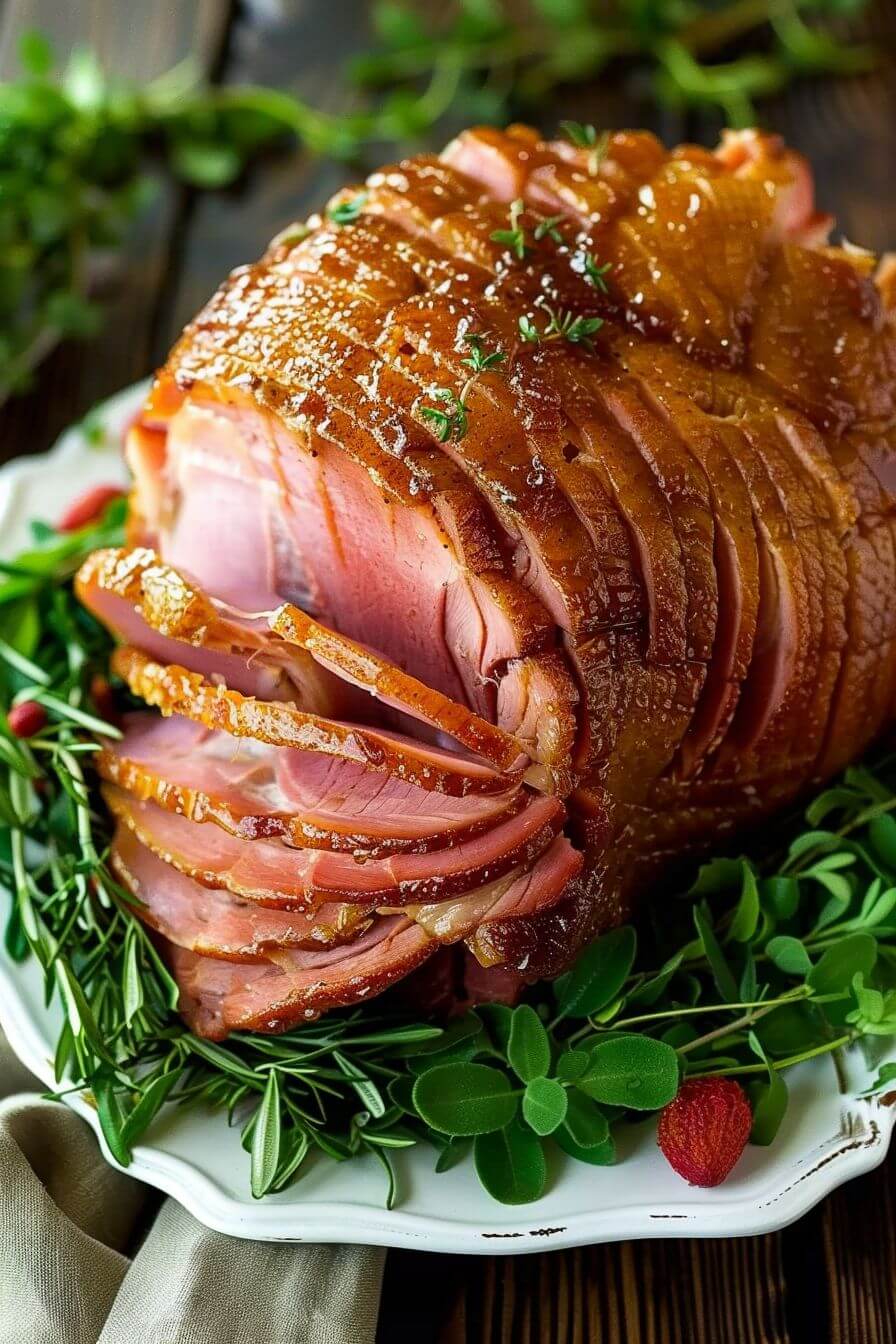
Honey Glazed Ham
There’s something about a glazed ham that just signals a gathering.
It’s not subtle. It’s not quiet. It sits right in the center of the table, glossy and golden, and somehow makes everything else feel more complete. You can have all the sides in the world, but once the ham shows up? That’s when it feels like a real meal.
And the best part? It’s actually one of the easier main dishes to pull off.
This Honey-Glazed Ham is warm, tender, lightly sweet, and finished with that signature sticky glaze that caramelizes just enough around the edges. It’s the kind of recipe that looks impressive—but doesn’t require constant attention.
Which, during busy holidays or family dinners, matters more than we like to admit.
Why This Recipe Works (Minimal Effort, Maximum Impact)
Let’s be honest—big main dishes can feel intimidating.
But ham is different.
Most hams you buy are already cooked. What you’re really doing here is reheating and adding flavor. That means:
- Less stress about doneness
- More focus on flavor and texture
- A much more forgiving process
The glaze does most of the heavy lifting. It seeps into the surface, coats the outside, and creates that glossy finish that makes everyone reach for a slice.
Ingredients (Simple, but Flavorful)
- 1 fully cooked bone-in ham (about 6–8 pounds)
For the glaze:
- ½ cup honey
- ¼ cup brown sugar
- 2 tablespoons Dijon mustard
- 2 tablespoons butter
- ¼ teaspoon ground cloves (optional)
- ¼ teaspoon black pepper
A few helpful notes before you start:
Bone-in ham has more flavor
It tends to stay juicier and gives you better texture.
Don’t skip the mustard
It balances the sweetness and keeps the glaze from tasting flat.
Cloves are optional
They add a traditional flavor, but you can skip them if your family prefers a simpler taste.
Step-by-Step (Straightforward and Reliable)
Start by preheating your oven to 325°F.
Place the ham in a roasting pan, cut side down.
If your ham has a thick outer skin, you can trim it slightly—but leave some fat for flavor.
Score the Surface (Small Step, Big Difference)
Using a sharp knife, score the surface of the ham in a diamond pattern.
Not too deep—just enough to cut through the top layer.
This helps the glaze seep in and gives you that classic look.
Cover and Warm (Keep It Juicy)
Cover the ham loosely with foil and place it in the oven.
Bake for about 10–12 minutes per pound.
This step is just about warming it through—not glazing yet.
Make the Glaze (Quick and Worth It)
In a small saucepan, combine:
- Honey
- Brown sugar
- Dijon mustard
- Butter
- Spices
Heat gently until everything melts and comes together into a smooth glaze.
It should be thick but pourable.
Glazing the Ham (This Is Where It Shines)
About 30–40 minutes before the ham is done, remove the foil.
Brush a generous layer of glaze over the surface.
Return it to the oven uncovered.
Every 10–15 minutes, brush on more glaze.
This builds up that sticky, caramelized coating.
The Final Finish (That Glossy Look)
As it finishes baking, the glaze will:
- Darken slightly
- Become shiny and sticky
- Collect in the scored edges
If you want a deeper caramelization, you can turn the oven up slightly for the last few minutes—but keep an eye on it so it doesn’t burn.
Rest Before Slicing (Don’t Skip This)
Once done, let the ham rest for about 10–15 minutes.
This helps the juices settle and makes slicing easier.
Make-Ahead & Reheating (Because Timing Matters)
Ham is great for planning ahead.
You can:
- Bake and glaze earlier in the day
- Reheat gently covered with foil
- Add a fresh layer of glaze before serving
It holds up well, which is why it’s such a reliable centerpiece.
Serving Ideas (And Let’s Talk Leftovers)
Serve slices warm with your favorite sides.
But let’s be honest—leftovers are part of the appeal.
Use extra ham for:
- Sandwiches the next day
- Breakfast scrambles
- Soups or casseroles
It’s one of those dishes that keeps giving.
A Small Real-Life Note
Some edges will caramelize more than others.
Some glaze will drip into the pan.
Someone will grab a slice before it’s fully served.
All completely normal.
Why This Dish Sticks Around
There’s a reason honey-glazed ham shows up year after year.
It’s reliable. It feeds a crowd. It looks impressive without being complicated.
And maybe most importantly—it brings people to the table.
Conclusion
This Honey-Glazed Ham offers a simple yet flavorful way to create a memorable centerpiece without added stress. With a straightforward process and a balanced glaze, it delivers both visual appeal and satisfying taste.
Whether you’re preparing it for a holiday gathering or a family dinner, it’s a dependable option that combines ease with tradition.
And once you’ve made it this way, it quickly becomes one of those recipes you return to whenever you need something that feels both special and manageable.
Honey-Glazed Ham
Ingredients
Method
- Preheat oven to 325°F and place ham cut side down in a roasting pan.
- Score the surface of the ham in a diamond pattern using a sharp knife.
- Cover loosely with foil and bake for 10–12 minutes per pound to warm through.
- In a saucepan, combine honey, brown sugar, Dijon mustard, butter, cloves, and pepper. Heat until smooth.
- Remove foil 30–40 minutes before done. Brush glaze generously over the ham.
- Continue baking uncovered, brushing additional glaze every 10–15 minutes.
- Optional: increase oven temperature slightly at the end for deeper caramelization.
- Remove from oven and let rest 10–15 minutes before slicing and serving.
Notes