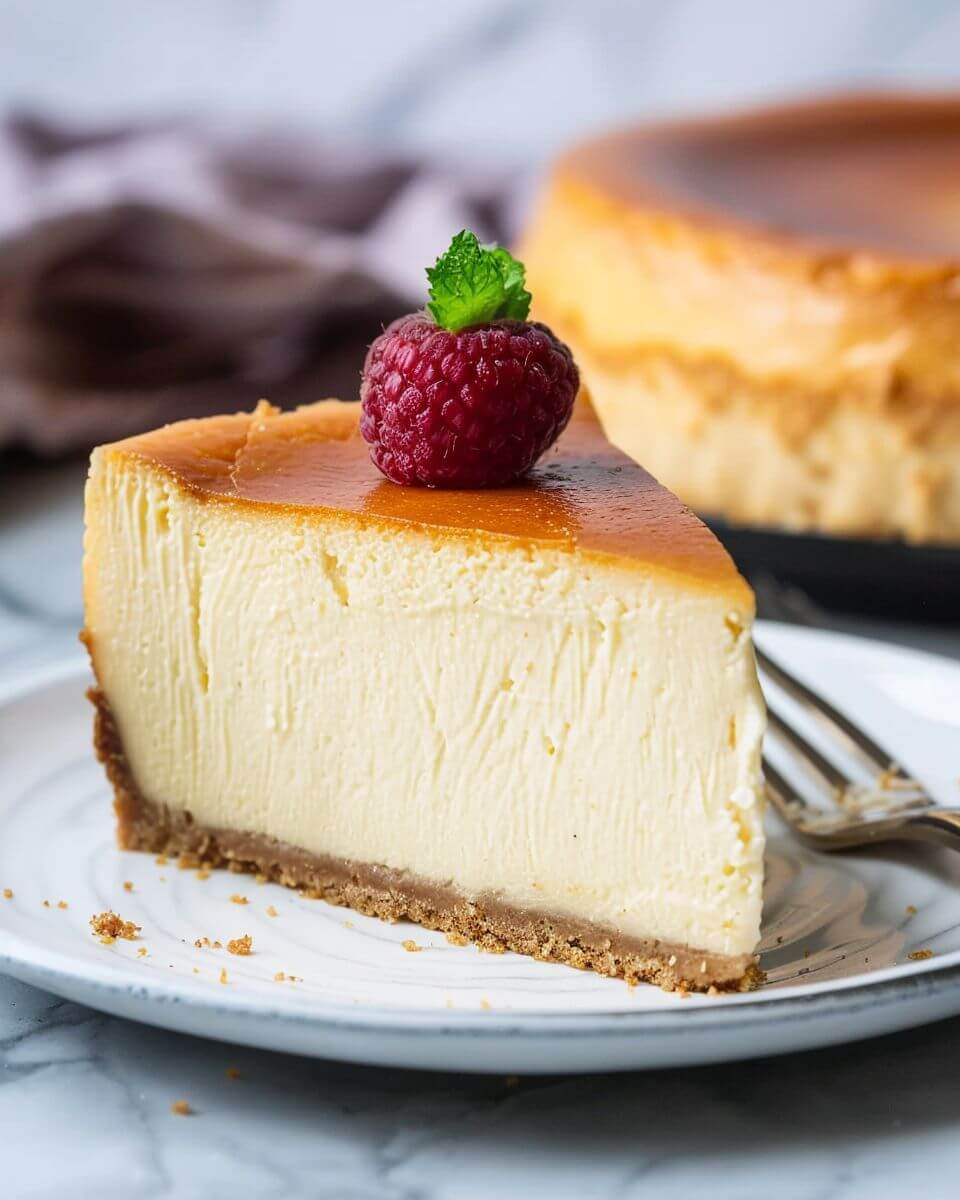
New York Cheesecake
New York Cheesecake (Creamy, Classic, and Totally Worth It)
There’s something about a true New York Cheesecake that feels… a little fancy, but also deeply comforting. It’s rich without being over-the-top, dense but still silky, and somehow manages to make an ordinary evening feel like a celebration.
Now, I know what you might be thinking—cheesecake sounds complicated. Water baths? Cracks? All that stress?
Here’s the honest truth: it’s not hard. It just asks for a little patience. And once you make it once, you’ll realize—it’s actually kind of forgiving.
And yes, your kitchen might smell like a bakery for a few hours. Not a bad trade, right?
Ingredients (Real-Life Friendly, With Options)
Let’s keep this simple and flexible.
For the crust:
- 1 ½ cups graham cracker crumbs
- ¼ cup sugar
- ½ cup melted butter
(No graham crackers? Crushed digestive biscuits or vanilla wafers work just fine.)
For the filling:
- 4 (8 oz) blocks cream cheese, softened
- 1 cup sugar
- 1 cup sour cream
- 1 tsp vanilla extract
- 4 large eggs
- 2 tbsp all-purpose flour (optional, but helps stabilize)
Optional toppings:
- Fresh berries
- Strawberry sauce
- Whipped cream
Quick kitchen note:
Softened cream cheese matters. Like, really matters. Cold cream cheese = lumpy batter = unnecessary frustration.
If you forget (we all do), cut it into cubes and let it sit for 20–30 minutes.
Step-by-Step Instructions (You’ve Got This)
1. Preheat and prep
Preheat your oven to 325°F.
Line the bottom of a springform pan with parchment paper and lightly grease the sides.
Wrap the outside of the pan with foil if you plan to use a water bath (more on that in a minute).
2. Make the crust
In a bowl, mix:
- Graham cracker crumbs
- Sugar
- Melted butter
Press firmly into the bottom of the pan.
Bake for 8–10 minutes, then let it cool.
This step smells amazing, by the way. A small win already.
3. Make the filling
In a large bowl, beat the cream cheese until smooth.
Add sugar and mix until creamy—not rushed, take your time here.
Then mix in:
- Sour cream
- Vanilla
- Flour (if using)
Finally, add eggs one at a time, mixing gently after each.
Don’t overmix—this is one of those quiet rules that really matters. Too much air = cracks later.
4. Assemble
Pour the filling over the cooled crust and smooth the top.
Give the pan a gentle tap on the counter to release air bubbles. It’s oddly satisfying.
5. Bake (the part everyone overthinks)
Place the cheesecake in a larger baking dish and pour hot water around it (about halfway up the sides).
This is your water bath—it helps the cheesecake bake evenly and stay creamy.
Bake for 60–75 minutes.
You’re looking for:
- Set edges
- Slight jiggle in the center (like Jell-O, not soup)
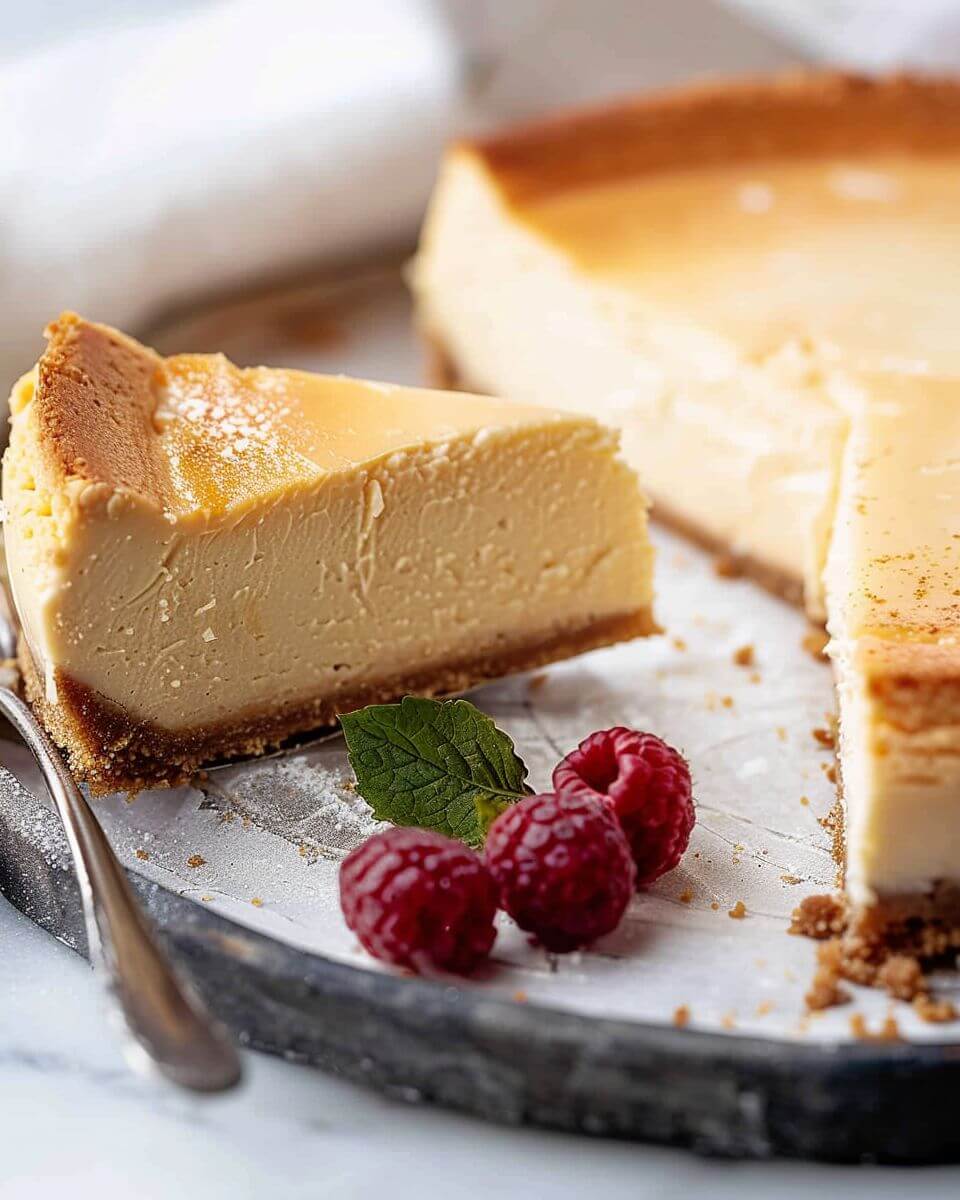
6. Cool slowly (this is the secret step)
Turn off the oven, crack the door open, and let the cheesecake sit inside for 1 hour.
Then remove and let it cool completely at room temperature.
After that, refrigerate for at least 4 hours—but overnight is even better.
Yes, waiting is hard. But this is where the magic happens.
Tips That Actually Make a Difference
Let’s keep this practical:
- Don’t skip the slow cooling: It helps prevent cracks
- Water bath = creamy texture: You can skip it, but you’ll notice the difference
- Room temp ingredients: This is non-negotiable for smooth batter
- Don’t overbake: Slight jiggle = perfect texture later
And honestly? Even if it cracks, it still tastes incredible. A little whipped cream covers everything.
Variations (Because Plain Isn’t Always the Favorite)
1. Strawberry Swirl Cheesecake
Before baking, swirl in a few spoonfuls of strawberry jam. It looks fancy with almost no extra effort.
2. Chocolate Lover’s Version
Add melted chocolate to half the batter and swirl it in.
Or just drizzle chocolate on top and call it a day.
3. Mini Cheesecakes (Kid-Friendly)
Use a muffin tin with liners. Bake for about 18–22 minutes.
Perfect for portion control… or not. Depends on the day.
4. Lighter Version
Use:
- Reduced-fat cream cheese
- Greek yogurt instead of sour cream
Still creamy, just a little less heavy.
Make-Ahead + Storage (Busy Mom Approved)
This dessert is actually better when made ahead.
Make-ahead:
Prepare it the day before serving. It sets beautifully overnight.
Storage:
- Fridge: 4–5 days (covered)
- Freezer: Up to 2 months (wrap slices individually)
Pro tip: frozen cheesecake slices are dangerously good straight from the freezer.
Serving Ideas (Keep It Easy)
You don’t need to overdo it here.
- Fresh berries + powdered sugar
- Simple whipped cream
- A drizzle of honey or caramel
Or just serve it plain. A good New York cheesecake doesn’t need much help.
A Small Real-Life Moment
You know what’s funny? Cheesecake has this reputation of being “special occasion” food.
But once you make it at home, it becomes one of those quiet luxuries. A slice after the kids go to bed. A forkful straight from the fridge. That little pause in a busy day.
It’s not just dessert—it’s a moment.
Conclusion
New York Cheesecake might seem like a project at first, but it’s really just a series of simple steps done with a bit of care.
It doesn’t demand perfection. It just asks you to slow down a little—mix gently, bake patiently, let it rest.
And in return? You get something rich, creamy, and genuinely satisfying. The kind of dessert that makes people pause mid-bite and go, “Wait… you made this?”
And honestly, that moment alone makes it worth it.
New York Cheesecake
Ingredients
Method
- Preheat oven to 300°F. Butter a 10-inch springform pan and wrap the outside with a double layer of foil to prevent leaks.
- In a large bowl, beat eggs and sour cream until smooth and well combined.
- In another bowl, beat cream cheese and butter until creamy. Add to egg mixture and blend until smooth.
- Add sugar, cornstarch, vanilla, lemon juice, and lemon zest. Beat thoroughly for about 2 minutes.
- Pour batter into prepared pan and place it inside a larger roasting pan. Add hot water halfway up the sides to create a water bath.
- Bake for 2 hours 15 minutes, until lightly colored and set. A knife inserted in the center should come out clean.
- Remove from water bath, peel off foil, and cool at room temperature for about 4 hours.
- Refrigerate until fully chilled, preferably overnight, before slicing and serving.
Notes