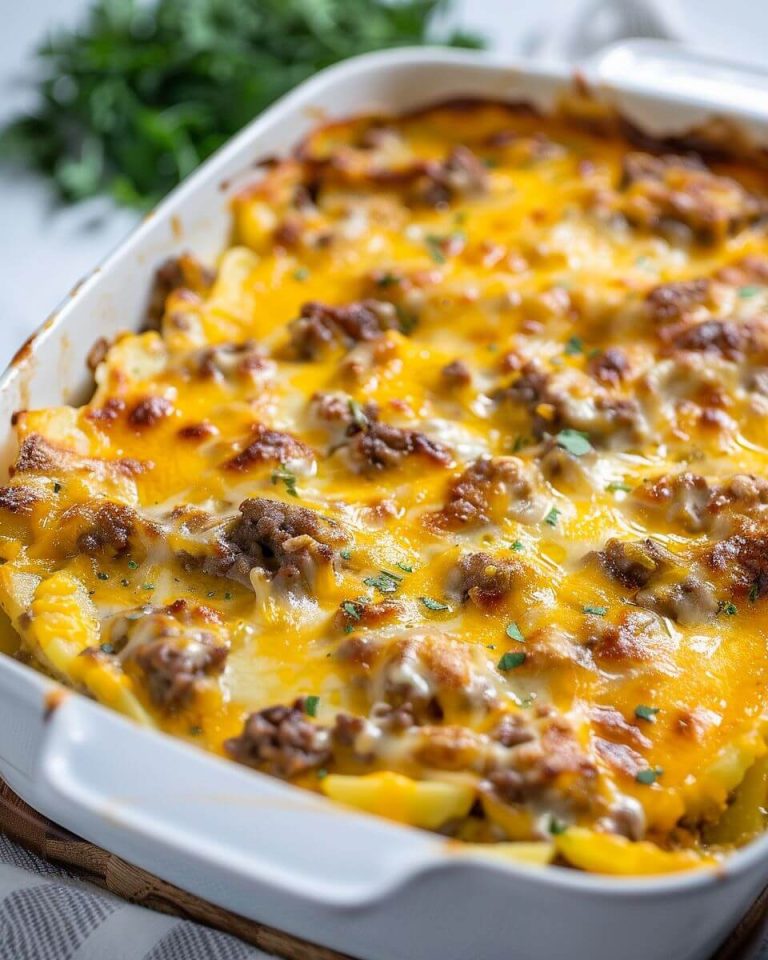
Bacon Cheeseburger Casserole
Bacon Cheeseburger Casserole (Because Some Nights Just Need Comfort Food)
You know those evenings when everyone’s hungry, slightly cranky, and somehow expecting dinner to fix everything? Yeah—this is that recipe.
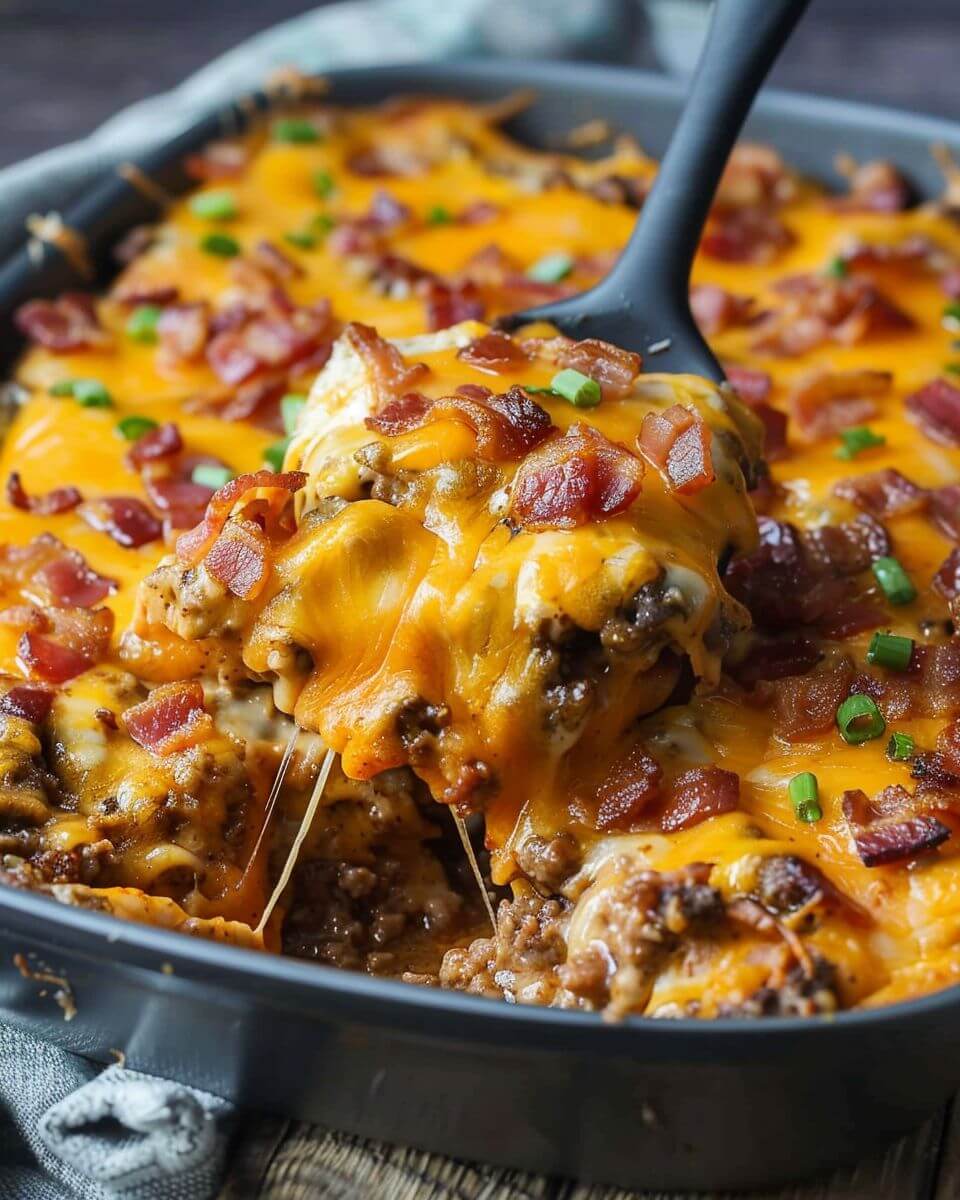
This Bacon Cheeseburger Casserole is cozy, filling, and honestly feels like a cheat meal… except you made it at home, in one dish, without juggling three pans and a timer that won’t stop beeping. It’s got all the flavors of a classic cheeseburger—savory beef, crispy bacon, melty cheese—but baked into something scoopable, shareable, and just plain easier.
And here’s the kicker: it’s one of those meals that disappears fast. Like, “should’ve doubled it” fast.
Why This “Recipe” Always Disappears First
Let me explain—it hits a very specific craving. It’s not fancy, not trendy, not trying too hard. It’s just really satisfying. And for busy moms (especially on school nights), that matters more than anything.
It’s also a crowd-pleaser across ages. Toddlers? Love it. Teens? Go back for seconds. Adults? Quietly scraping the last bits from the pan.
There’s something about combining familiar flavors in a new format that just works. It feels a little different, but still safe—like your favorite hoodie in a new color.
Ingredients (With a Few Easy Swaps)
This is one of those recipes where you can absolutely work with what you’ve got. No stress if you’re missing a thing or two.
Main Ingredients:
- 1 lb ground beef
- 6 slices bacon, cooked and crumbled
- 2 cups cooked pasta (elbow or rotini works great)
- 1½ cups shredded cheddar cheese
- 1 cup milk
- 2 eggs
- ½ cup diced onion
- ½ cup diced pickles (trust me on this—it gives that burger feel)
- 2 tablespoons ketchup
- 1 tablespoon mustard
- Salt and pepper to taste
Easy Swaps:
- Ground turkey instead of beef? Totally fine.
- No bacon? It’ll still be good—just less smoky.
- Dairy-free? Use plant milk and dairy-free cheese.
- Low-carb? Swap pasta for cauliflower florets (honestly, it works better than you’d think).
You don’t need perfection here. You need dinner on the table.

Step-by-Step Instructions (Simple and Doable)
Alright—this is where things come together. And no, it’s not complicated.
- Preheat your oven to 375°F.
Lightly grease a casserole dish. - Cook the bacon first.
Set it aside, crumble it later (try not to snack on half of it—no judgment if you do). - Brown the ground beef.
Add diced onion while cooking. Season with salt and pepper. Drain excess grease. - Mix the “burger flavor.”
Stir in ketchup, mustard, and pickles. This is where it starts smelling like dinner. - Combine everything.
Add cooked pasta and half the cheese to the beef mixture. Stir it all together. - Make the simple custard.
Whisk milk and eggs in a separate bowl. - Assemble.
Pour everything into the casserole dish. Add the milk mixture. Top with remaining cheese and crumbled bacon. - Bake for 25–30 minutes.
Until bubbly and golden on top. - Let it sit for 5 minutes before serving.
I know—it’s hard. But it helps everything set.
Tips That Actually Help
Let’s keep this real—these are the things that make a difference.
- Drain the beef well.
Too much grease = soggy casserole. Not ideal. - Don’t skip the pickles.
It sounds odd, but it’s what makes it taste like a cheeseburger instead of just cheesy pasta. - Use sharp cheddar if you can.
More flavor, less “meh.” - Cook pasta just shy of done.
It’ll finish cooking in the oven. - Let kids help sprinkle cheese.
Not a cooking tip, technically—but it buys you five minutes of peace.
Variations (Because Everyone Likes Something Different)
Once you’ve made this once, you’ll probably start tweaking it. That’s part of the fun.
1. BBQ Bacon Cheeseburger Casserole
Swap ketchup for BBQ sauce. Slightly smoky, a little sweet—really good.
2. Loaded Version
Add diced tomatoes, lettuce (after baking), and a drizzle of burger sauce on top.
3. Spicy Kick
Throw in jalapeños or a dash of hot sauce. Not kid-friendly for everyone—but great for grown-ups.
4. Keto-Friendly
Skip the pasta, double the meat, and add cream cheese for richness.
5. Tater Tot Topping
Layer frozen tater tots on top before baking. Crispy, golden, and very popular with kids.
Honestly, there’s no wrong direction here.
Make-Ahead + Storage
Because sometimes dinner needs to happen before the chaos starts.
Make-Ahead:
- Assemble the casserole earlier in the day, cover, and refrigerate.
- Bake when ready (add 5 extra minutes if it’s cold from the fridge).
Storage:
- Fridge: Up to 4 days
- Freezer: Up to 2 months (wrap tightly)
Reheating:
- Oven: Best option for texture
- Microwave: Quick and fine for busy days
And yes—it reheats well. Maybe even better the next day.
What to Serve With It
This casserole is hearty, so sides can stay simple.
Easy Pairings:
- A crisp green salad (something fresh balances it out)
- Steamed broccoli or green beans
- Sweet potato fries (if you’re leaning into comfort food)
- Coleslaw for a little crunch
And if you’re feeling fun—serve with extra pickles and dipping sauces on the side. It turns dinner into a bit of an event.
Conclusion
Here’s the thing—this Bacon Cheeseburger Casserole isn’t trying to impress anyone. It’s not complicated or delicate. It’s just solid, comforting, dependable food.
And honestly? That’s exactly what most nights need.
It’s the kind of meal that gets everyone to the table without complaints. The kind that fills the kitchen with a smell that says, “Dinner’s ready,” before you even call it out.
And maybe that’s why it disappears so fast. Not just because it tastes good—but because it feels like home.
Bacon Cheeseburger Casserole
Ingredients
Method
- Preheat oven to 350°F and lightly grease a 9x13-inch casserole dish.
- In a large skillet over medium-high heat, cook ground beef with garlic and onion powder until browned and crumbly. Drain excess fat.
- Spread cooked beef evenly in the casserole dish and stir in bacon pieces.
- In a bowl, whisk eggs, heavy cream, salt, and pepper until combined. Stir in about 8 oz of the shredded cheese.
- Pour egg mixture over the beef and bacon. Sprinkle remaining cheese evenly on top.
- Bake for 30–35 minutes, until set and golden brown on top.
- Let rest a few minutes before slicing and serving.
Notes