Mom’s Flat Apple Pie
Mom’s Flat Apple Pie (The Old-Fashioned Sheet Pan Pie That Feeds a Crowd)
Mom’s flat apple pie is the kind of dessert that feels like it came from a handwritten recipe card.
Not a glossy cookbook. Not a fancy bakery case. A real recipe card—the one with butter smudges, a little cinnamon dust in the corner, and maybe the word “good” written next to it in pencil.
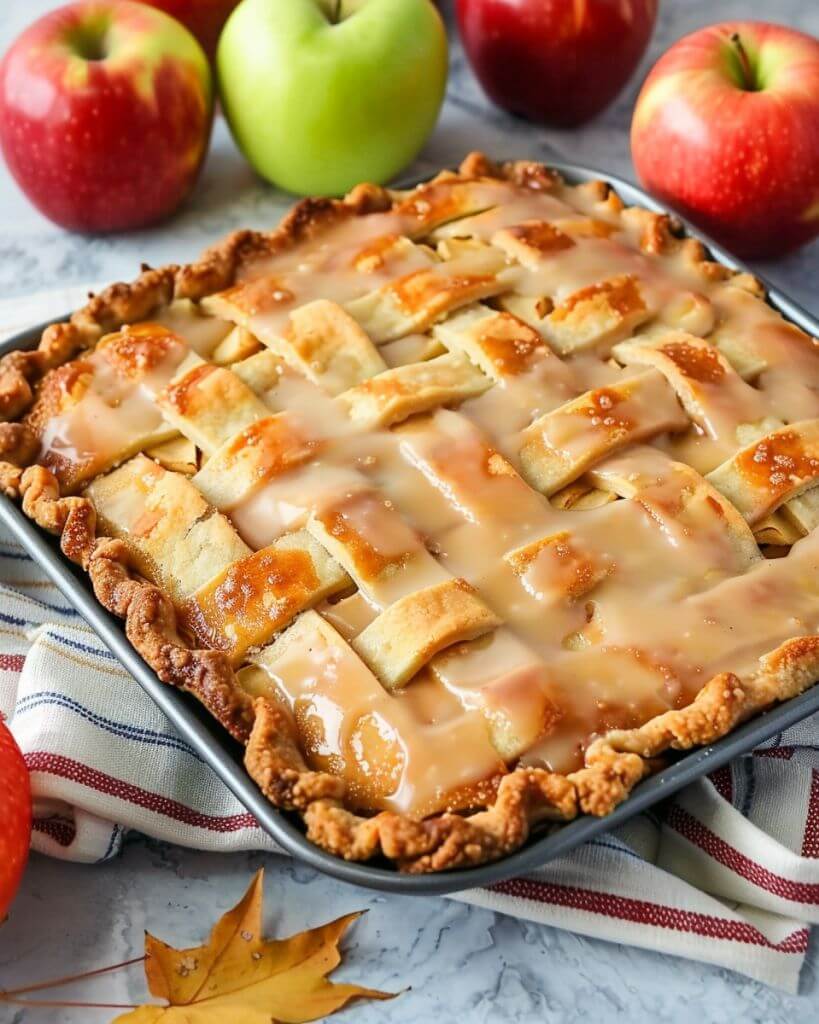
This pie is simple, cozy, and made for sharing. Instead of a deep-dish pie plate, it bakes flat in a sheet pan or jelly roll pan, which means more golden crust, more tender apple filling, and plenty of squares to pass around.
And honestly? That’s the beauty of it.
It’s perfect for holidays, potlucks, Sunday supper, fall weekends, or any time you want apple pie flavor without making a picture-perfect pie. No tall mounds. No dramatic lattice required. Just flaky crust, cinnamon apples, and a sweet glaze or sprinkle of sugar on top.
It tastes like home.
Maybe even like your mom’s kitchen, if you were lucky.
Why This “Recipe” Always Disappears First
There’s something about apple pie that makes people soften a little.
Maybe it’s the cinnamon. Maybe it’s the buttery crust. Maybe it’s because apple pie has been showing up at family tables for so long that it feels less like dessert and more like a memory.
Flat apple pie has all of that, but it’s easier to serve.
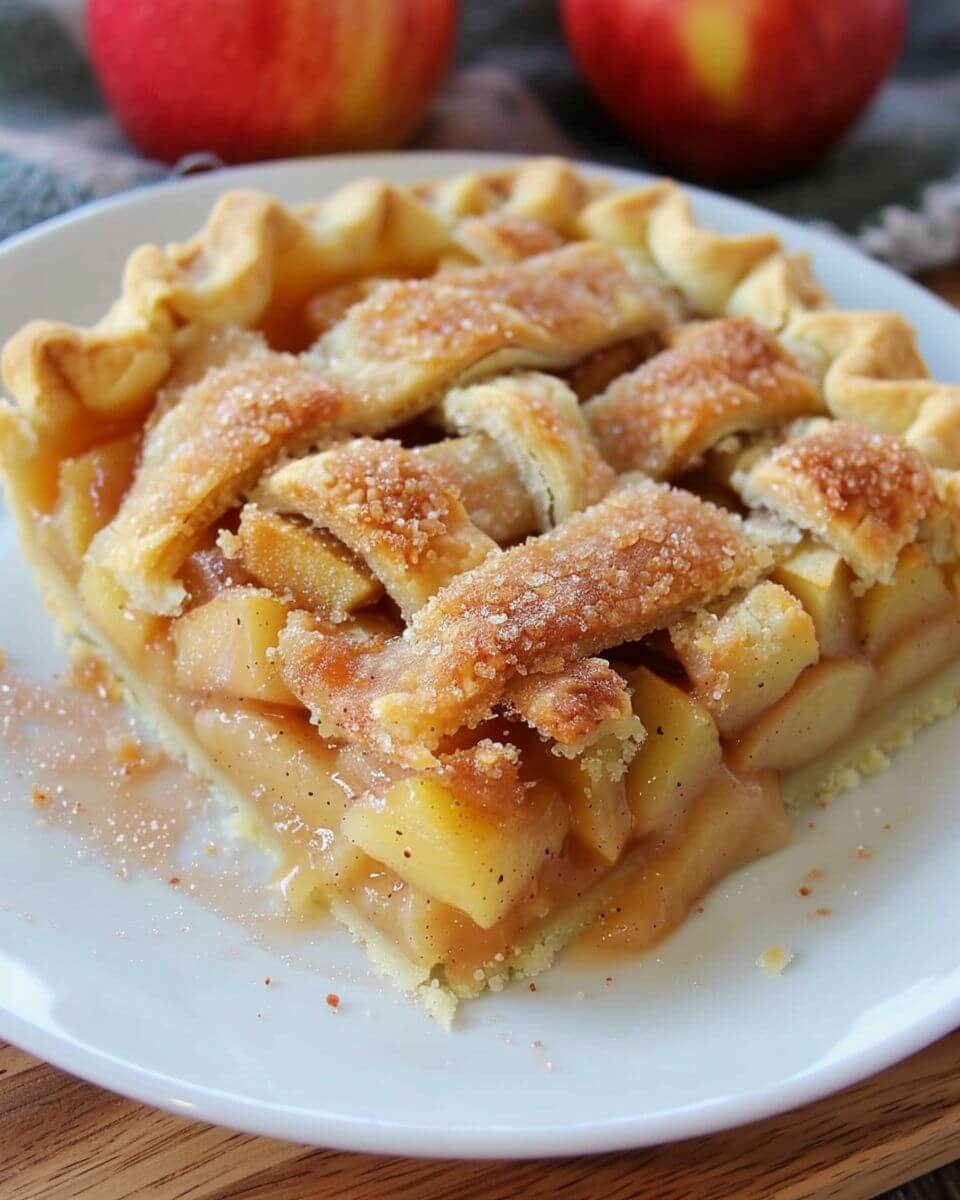
That matters more than people admit. Regular pie is lovely, but sometimes the first slice falls apart, the filling slides, and someone gets a tiny piece while someone else gets half the crust. Flat pie solves that. You cut it into neat squares, place them on plates, and suddenly dessert feels calmer.
Well, mostly calmer.
Someone will still ask for the corner piece.
This pie is also great for feeding a crowd. A sheet pan stretches further than a standard 9-inch pie, which makes it a favorite for family gatherings, bake sales, and church dinners where everyone wants “just a small piece.”
Small piece, sure.
Then they come back for another.
Ingredients (With a Few Easy Swaps)
The ingredient list is classic and comforting. Apples, sugar, cinnamon, butter, and crust. Nothing strange. Nothing dramatic.
Basic Ingredients:
For the crust:
2 ½ cups all-purpose flour
1 teaspoon salt
1 cup cold butter, cubed
1 egg yolk
½ cup cold milk
For the apple filling:
6 cups peeled and thinly sliced apples
¾ cup granulated sugar
2 tablespoons all-purpose flour
1 teaspoon cinnamon
¼ teaspoon nutmeg
1 tablespoon lemon juice
2 tablespoons butter, cut into small pieces
For the glaze:
1 cup powdered sugar
1–2 tablespoons milk
½ teaspoon vanilla extract
Easy Swaps & Notes:
Want it less sweet? Reduce the sugar to ½ cup.
Need a shortcut? Use refrigerated pie crusts.
Want more spice? Add a pinch of cloves or apple pie spice.
Prefer tart apples? Granny Smith works beautifully.
Want a softer flavor? Use Honeycrisp, Gala, or Golden Delicious.
And yes, mixing apple varieties helps.
Tart apples give the pie brightness. Sweet apples make it mellow. Together, they create a filling that tastes fuller and less one-note.
Kind of like a good family dinner conversation.
A little sweet, a little sharp, and somehow it works.
Step-by-Step Instructions (Simple and Doable)
This pie has a homemade crust, but don’t let that scare you.
It’s flat, forgiving, and covered with apples. Nobody is checking for bakery-level edges here.
1. Make the crust.
In a large bowl, whisk together the flour and salt.
Cut in the cold butter with a pastry cutter or fork until the mixture looks like coarse crumbs.
In a small bowl, whisk together the egg yolk and cold milk. Add it to the flour mixture and stir until the dough comes together.
If it seems dry, add another tablespoon of milk.
The dough should hold together without feeling sticky.
2. Chill the dough.
Divide the dough into two pieces, one slightly larger than the other.
Wrap each piece and chill for about 30 minutes.
This helps the butter stay cold, which helps make the crust flaky.
Yes, chilling dough is annoying.
But flaky crust is worth a little patience.
3. Prepare the apples.
In a large bowl, toss the sliced apples with sugar, flour, cinnamon, nutmeg, and lemon juice.
The flour helps thicken the juices as the pie bakes.
The lemon keeps the apples bright and balances the sweetness.
And the cinnamon? Well, cinnamon is the whole mood.
4. Roll out the bottom crust.
Preheat your oven to 375°F.
Roll the larger piece of dough into a rectangle big enough to fit a 10×15-inch jelly roll pan.
Gently press it into the pan and up the sides.
If it tears, patch it.
That’s not failure. That’s pie-making.
5. Add the apple filling.
Spread the apple mixture evenly over the crust.
Dot the top with small pieces of butter.
This gives the filling a richer flavor and helps everything bake into that soft, cozy apple layer.
Already smells promising, doesn’t it?
6. Add the top crust.
Roll out the second piece of dough and place it over the apples.
Seal the edges as best you can, then cut a few small slits in the top so steam can escape.
You can crimp the edges with a fork if you want.
Or just press them together and move on with your life.
Both are valid.
7. Bake until golden.
Bake for 35–45 minutes, or until the crust is golden and the filling is bubbling through the slits.
If the edges brown too quickly, cover them loosely with foil.
Let the pie cool for at least 20–30 minutes before glazing.
The filling needs time to settle, and the glaze needs a not-too-hot surface.
Hot pie plus glaze equals disappearing glaze.
Still tasty, but less pretty.
8. Add the glaze.
Whisk together the powdered sugar, milk, and vanilla until smooth.
Drizzle the glaze over the cooled pie.
Let it set for a few minutes, then slice into squares.
This is the moment when everyone suddenly appears in the kitchen.
Funny how that happens.
Tips That Actually Help
Flat apple pie is simple, but a few little tricks make it better.
Slice the apples thin.
Thin apples bake evenly and make cleaner squares.
Keep the butter cold.
Cold butter helps create a flaky crust.
Use a jelly roll pan.
A rimmed pan keeps the filling where it belongs.
Let the pie cool before cutting.
The filling sets and slices better.
Don’t skip the steam slits.
They keep the top crust from puffing too much.
And one more thing? Put the pan on a larger baking sheet if you’re worried about bubbling.
Apple filling has a mind of its own sometimes.
Better safe than scrubbing burnt sugar from the oven.
Variations (Because Everyone Likes Something Different)
Once you make the classic version, it’s easy to make it your own.
1. Caramel Apple Flat Pie
Drizzle caramel sauce over the apples before adding the top crust.
Or drizzle it over the finished pie with the glaze.
Sweet, sticky, and very fall.
2. Crumb-Topped Flat Apple Pie
Skip the top crust and use a crumb topping made with butter, brown sugar, flour, and cinnamon.
It becomes part pie, part apple crisp.
Nobody will be upset.
3. Maple Apple Pie
Replace part of the sugar with maple syrup.
The flavor gets deeper and warmer, especially with a pinch of nutmeg.
Very cozy with coffee.
4. Cranberry Apple Version
Add ½ cup fresh or dried cranberries to the apple filling.
The tart cranberries brighten everything and make the pie look pretty for holiday tables.
5. Shortcut Flat Apple Pie
Use refrigerated pie crusts and canned apple pie filling.
Is it exactly the same? No.
Will it still disappear at a potluck? Absolutely.
Some days call for shortcuts.
No guilt.
Make-Ahead + Storage
Mom’s flat apple pie is a great make-ahead dessert because it serves well at room temperature.
That makes it perfect for parties, holidays, and busy weekends when oven space is basically a family argument.
Make-Ahead:
You can bake the pie a day ahead.
Wait to add the glaze until the day you serve it if you want the top to look fresh.
Storage:
Room Temperature: Up to 2 days, loosely covered
Fridge: Up to 5 days in an airtight container
Freezer: Up to 2 months
Reheating:
Warm slices in the microwave for about 15 seconds.
Or place them in a low oven until gently warmed.
If frozen, thaw overnight in the fridge before reheating.
The crust may soften a little, but the flavor will still be lovely.
Especially with ice cream.
What to Serve With It
Flat apple pie is wonderful on its own, but the right topping turns it into a full dessert moment.
Simple Pairings:
Vanilla ice cream
Whipped cream
Caramel sauce
Hot coffee
Cold milk
Chai tea
Sharp cheddar cheese
Cinnamon whipped cream
Yes, cheddar cheese with apple pie is a real thing.
Some families swear by it. Some families look mildly alarmed.
Both reactions are fair.
For a classic dessert, serve warm squares with vanilla ice cream and let it melt into the cinnamon apples.
That little creamy puddle on the plate?
That’s happiness.
Conclusion
Here’s the thing about Mom’s flat apple pie—it doesn’t need to be fancy to be special.
It’s buttery, cinnamon-sweet, tender, and easy to share. It has all the flavor of homemade apple pie, but in a practical sheet-pan form that feeds more people and cuts into neat little squares.
Maybe it’s the glaze. Maybe it’s the flaky crust. Maybe it’s the way warm apples make a kitchen feel softer somehow.
Whatever the reason, this is the kind of dessert people remember.
Especially when it’s served warm.
Maybe with ice cream.
Actually, definitely with ice cream.
Mom's Flat Apple Pie
Ingredients
Method
- In a large bowl, whisk together the flour and salt for the crust.
- Cut in the cold cubed butter with a pastry cutter or fork until the mixture resembles coarse crumbs.
- In a small bowl, whisk together the egg yolk and cold milk.
- Add the milk mixture to the flour mixture and stir until the dough comes together, adding another tablespoon of milk if needed.
- Divide the dough into two pieces, one slightly larger than the other. Wrap and chill for about 30 minutes.
- In a large bowl, toss the sliced apples with granulated sugar, flour, cinnamon, nutmeg, and lemon juice.
- Preheat the oven to 375°F.
- Roll the larger piece of dough into a rectangle large enough to fit a 10x15-inch jelly roll pan.
- Gently press the dough into the pan and up the sides, patching any tears as needed.
- Spread the apple filling evenly over the bottom crust.
- Dot the apple filling with small pieces of butter.
- Roll out the second piece of dough and place it over the apples.
- Seal the edges, then cut a few small slits in the top crust to vent steam.
- Bake for 35–45 minutes, until the crust is golden and the filling is bubbling through the slits.
- If the edges brown too quickly, cover them loosely with foil.
- Let the pie cool for at least 20–30 minutes before glazing.
- Whisk together the powdered sugar, milk, and vanilla extract until smooth.
- Drizzle the glaze over the cooled pie and let it set for a few minutes.
- Slice into squares and serve.