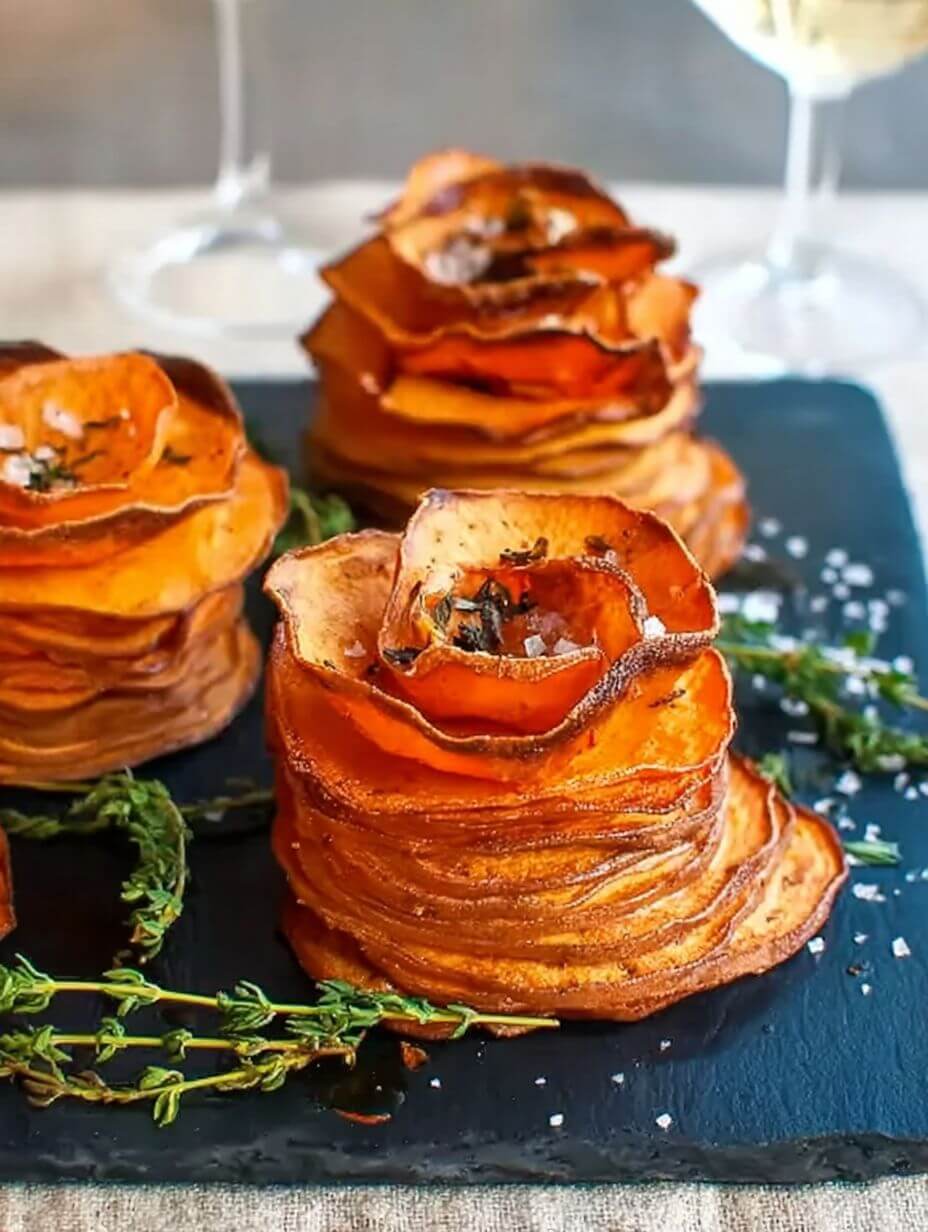
Honey-Butter Sweet Potato Stacks
There’s something about individual portions that instantly makes a dish feel a little more special.
These Honey-Butter Sweet Potato Stacks do exactly that. They take a humble ingredient—sweet potatoes—and turn it into something layered, glossy, and just a bit impressive… without actually being complicated.
Each stack is tender in the center, slightly crisp on the edges, and coated in a light honey-butter glaze that caramelizes as it bakes. Add a hint of garlic and thyme, and suddenly it feels like something you’d expect at a holiday dinner rather than a simple side.
And yet—once you start assembling them, you’ll realize how manageable they are.
Why This Recipe Works So Well
The magic here is in the layering.
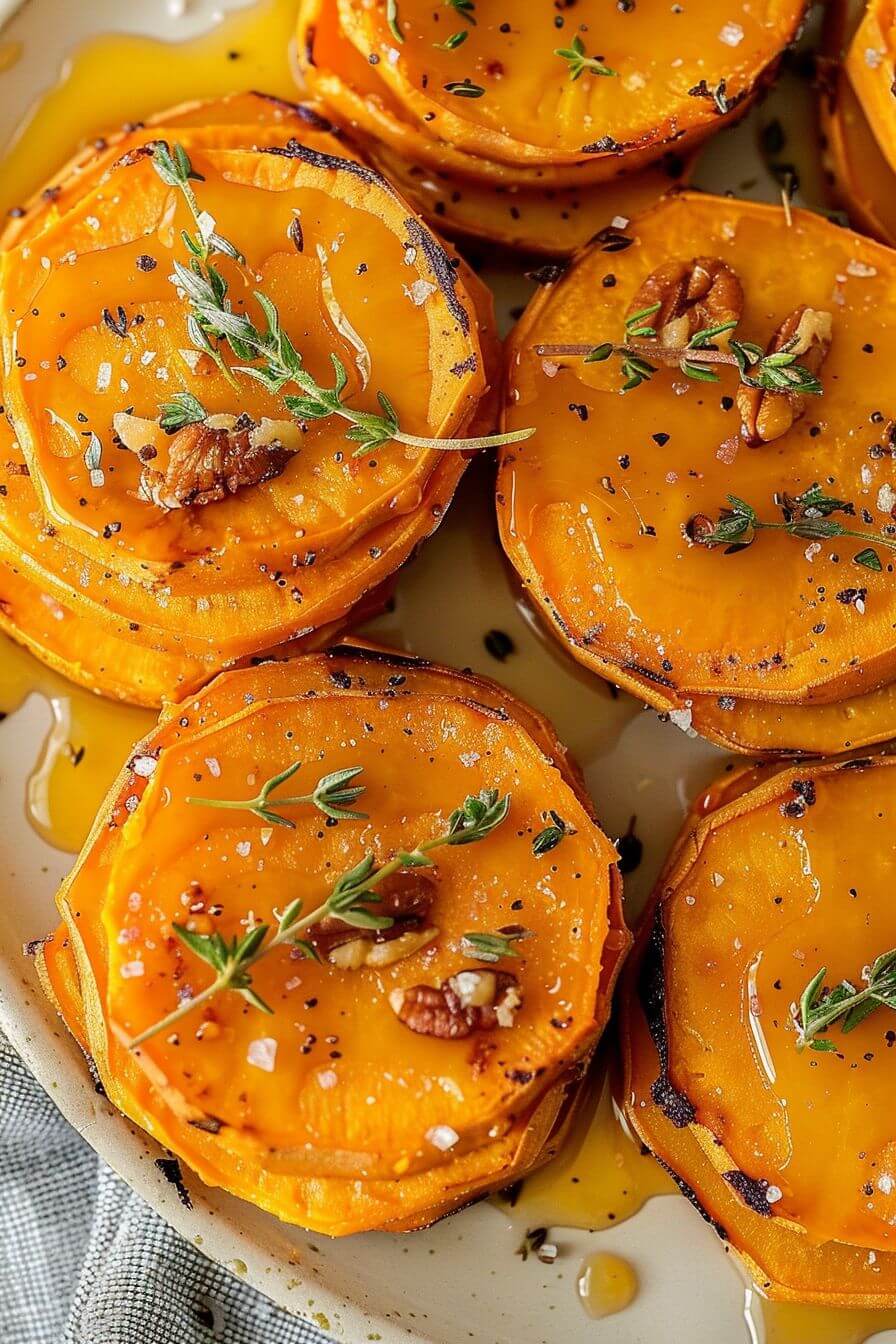
Thin slices of sweet potato absorb just enough butter and honey to soften and caramelize, while the edges crisp slightly in the oven. Because everything is stacked tightly in a muffin pan, the slices hold together and bake evenly.
What you get:
- Soft, melt-in-your-mouth centers
- Lightly crisp edges
- A balanced sweetness from honey
- Savory depth from garlic and herbs
It’s simple, but it feels thoughtfully put together.
Ingredients (Minimal, but Intentional)
- 2 pounds sweet potatoes
- 4 tablespoons butter
- 2 garlic cloves, grated
- 1 tablespoon fresh thyme
- 2 tablespoons honey
- ½ teaspoon salt
- ¼ teaspoon black pepper
A few helpful notes before you start:
Choose evenly shaped sweet potatoes
This makes slicing and stacking much easier.
Thin slices are key
A mandolin helps, but a sharp knife works too. Aim for very thin, even slices so they cook through properly.
Peeling is optional
Leaving the skin on adds a bit of texture and saves time.
Step-by-Step (It’s Mostly Layering)
Start by preheating your oven to 400°F and greasing your muffin pan well.
Next, melt the butter and whisk in the garlic and honey. Let it cool slightly so it doesn’t cook the potatoes on contact.
Slice and Toss (Where It Starts Coming Together)
Slice your sweet potatoes thinly—about 1/16-inch if possible.
Add them to a large bowl and pour the honey-butter mixture over the top.
Sprinkle in thyme, salt, and pepper.
Now gently toss everything.
You’re not trying to coat each slice heavily—just enough so the butter slips between layers.
Build the Stacks (Don’t Overthink It)
Take small groups of slices and stack them into each muffin cup.
Fill each one to the top—or even slightly above.
They’ll shrink a bit as they bake, so a full stack works in your favor.
They don’t have to be perfectly aligned. Once baked, they settle into shape.
Bake Until Tender and Golden
Place the pan in the oven and bake for 30–40 minutes.
You’re looking for:
- Tender centers (a fork should slide in easily)
- Lightly caramelized tops
- Slightly crisp edges
If some stacks tilt, you can gently adjust them after baking.
Rest Before Serving (Quick but Important)
Let the stacks sit for about 5 minutes after removing them from the oven.
This helps them firm up slightly so they lift out more cleanly.
Use a spoon or small spatula to remove them carefully.
Texture Tips (For the Best Results)
If you want that perfect balance:
Slice thinly and evenly.
Don’t skip greasing the pan—this prevents sticking.
Avoid overcrowding slices too tightly—leave just enough space for heat to circulate.
And bake long enough to develop color, not just softness.
Make-Ahead (A Holiday Lifesaver)
These are great for prepping ahead.
You can:
- Slice and assemble earlier in the day, then bake before serving
- Bake fully and reheat in the oven
They hold their shape well and reheat beautifully, which makes them ideal for busy holiday meals.
Serving Ideas (They Fit Almost Anywhere)
These stacks are incredibly versatile.
Serve them:
- Alongside roasted meats
- As part of a holiday spread
- With a drizzle of extra honey for sweetness
- Topped with fresh herbs for a brighter finish
They look polished on a platter, but still feel approachable.
A Small Real-Life Note
Some stacks will be perfectly neat.
Some will lean a little.
Some edges will caramelize more than others.
That’s part of the charm.
Those slightly crisp, golden bits? They’re usually the first to go.
Conclusion
These Honey-Butter Sweet Potato Stacks bring together simple ingredients and a straightforward method to create a side dish that feels both elegant and comforting. With their layered texture, subtle sweetness, and savory herb notes, they add something special to any table without adding stress to your cooking process.
Whether you’re preparing a holiday meal or just looking to elevate a familiar ingredient, this recipe delivers consistency, flavor, and presentation in one easy approach.
And once you’ve made them, they tend to become a go-to whenever you want something that looks as good as it tastes.
Honey-Butter Sweet Potato Stacks
Ingredients
Method
- Preheat oven to 400°F and grease a 12-cup muffin pan.
- Melt butter and whisk with garlic and honey.
- Slice sweet potatoes very thin and place in a bowl.
- Toss slices with butter mixture, thyme, salt, and pepper.
- Stack slices into muffin cups, filling to the top.
- Bake 30–40 minutes until tender and caramelized.
- Rest briefly, then remove and garnish with fresh thyme.
Notes